Mount the Device in a Rack
Use these instructions if you plan to mount your Roving Edge Device in a standard rack.
The optional rackmount kit can be used to install the device in a four-post, 19-inch standard rack.
Rackmounting the Device
-
Separate the device mounting brackets from the slide-rails.
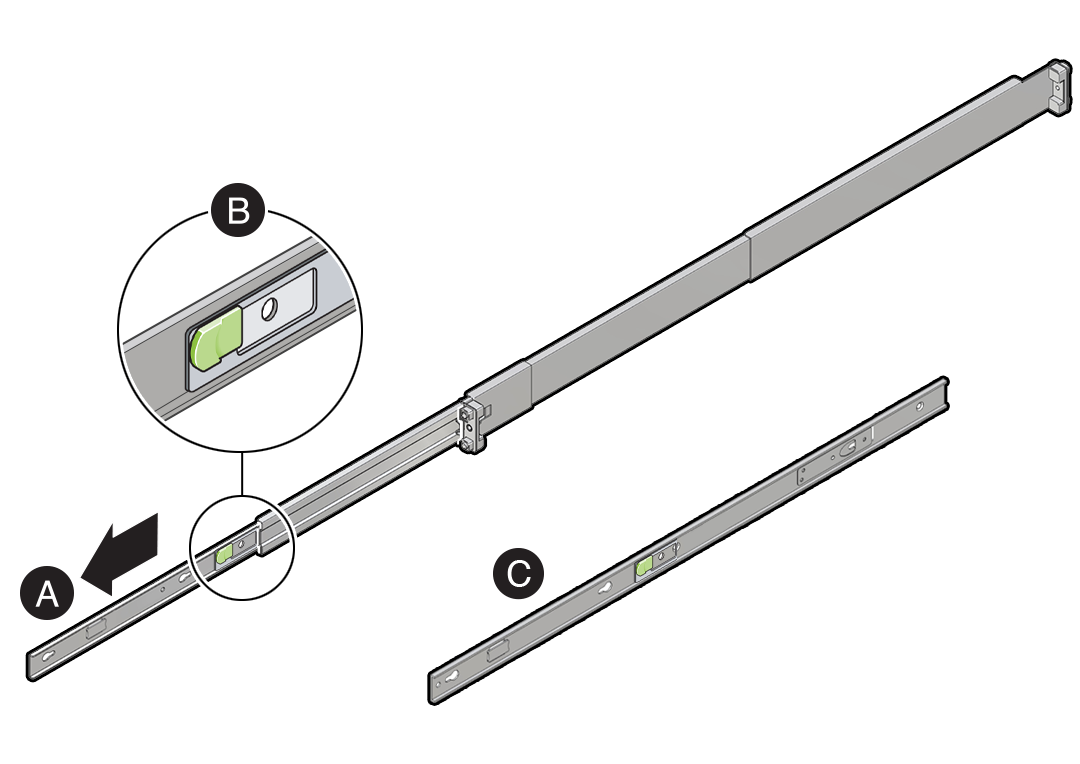
- Pull the mounting brackets out of the slide-rail brackets.
- Press the release lever to release the locking mechanism.
- Remove the mounting brackets from side-rails.
-
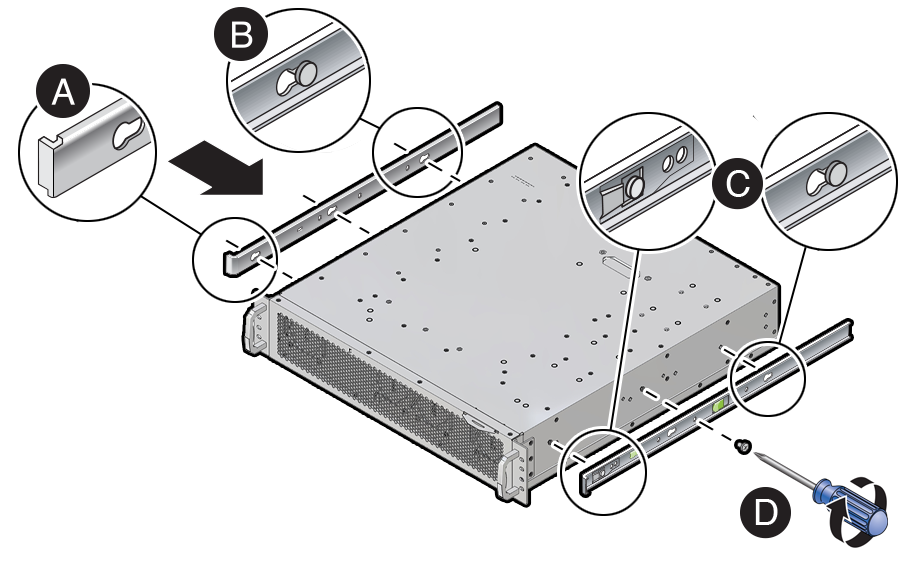
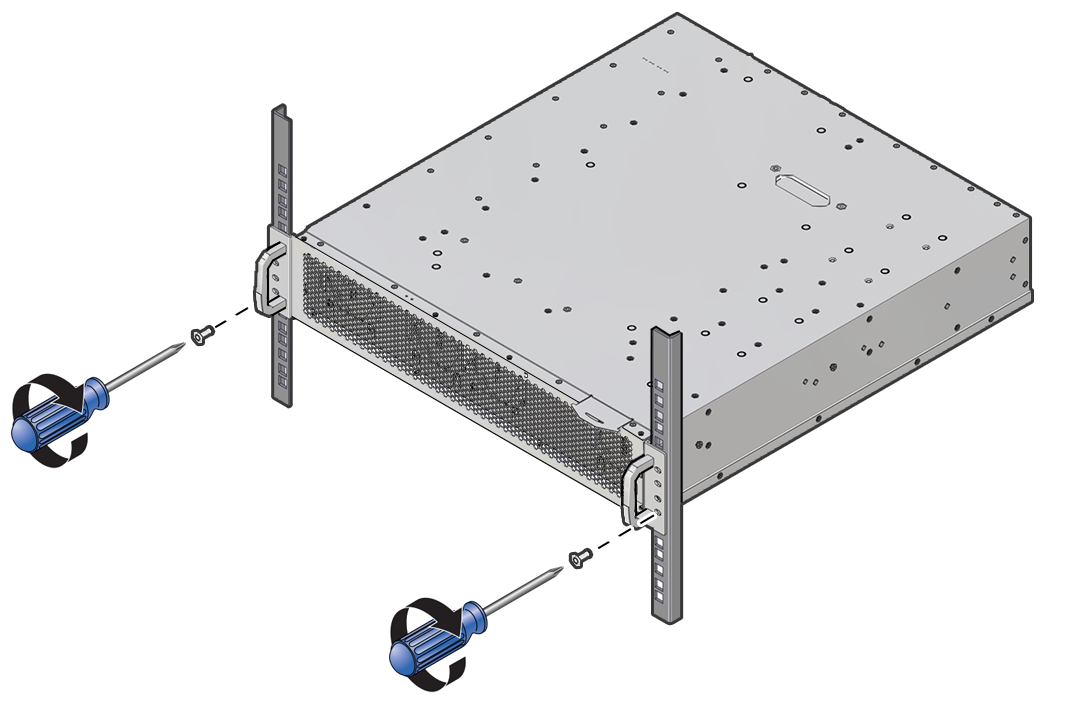
Attach the mounting brackets to the device.
-
Position the mounting brackets against the device so that the slide-rail stop is at the front of the device.
- Line up the keyhole openings on the mounting bracket with the locating pins on the side of the device.
- Push the mounting brackets forward until they lock in place with an audible select.
- Secure the mounting brackets by installing one M4 screw to each side of the device.
-
-
Identify the location in the rack where you want to place the device.
Roving Edge Device requires two rack units (2U) of vertical space.
Caution
To reduce the risk of personal injury, stabilize the rack cabinet, and if available, extend the anti-tilt bar before you install the server.
-
If your rack posts aren't labeled, mark the mounting holes on the front and rear posts to ensure a level installation.
-
Attach the two slide-rails to the rack.
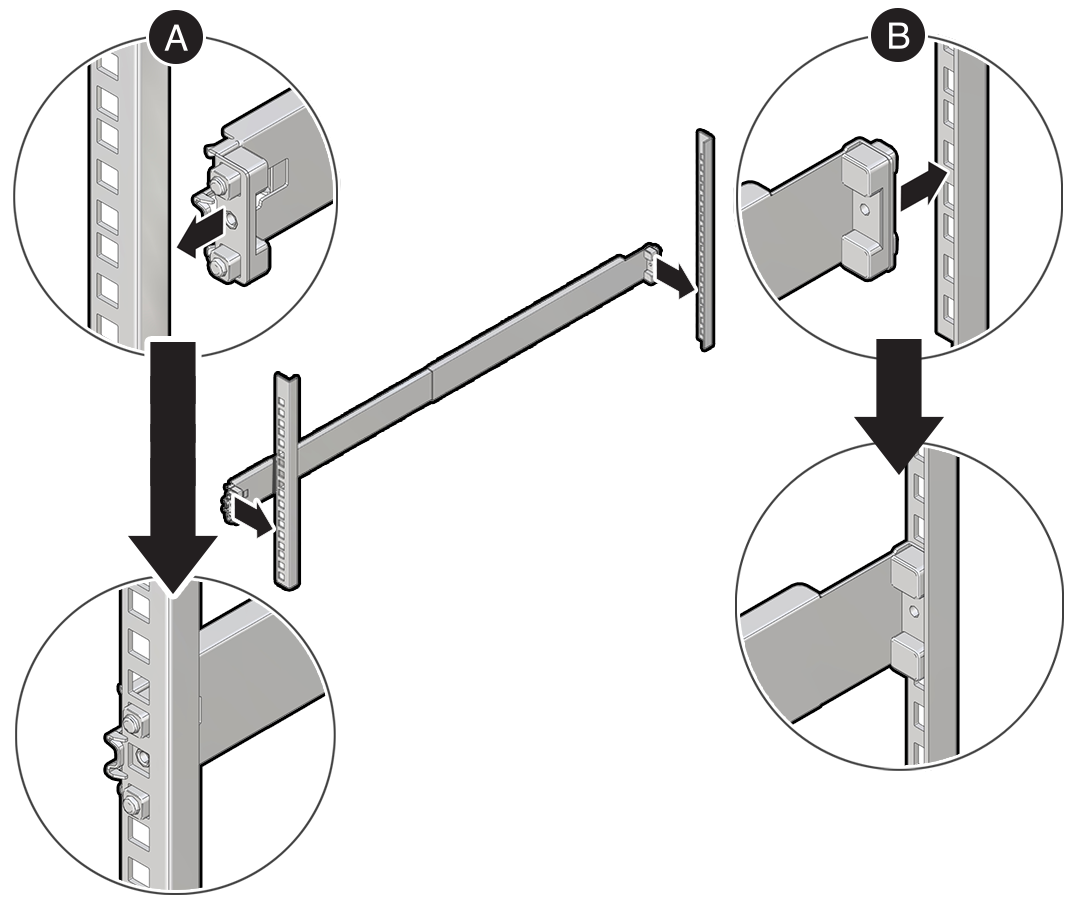
- Snap the front slide-rails into the front rack posts.
- Adjust the rear slide-rails to reach the rear rack posts, then snap the slide-rails into the rear rack posts.
-
Install the device into the slide-rails.
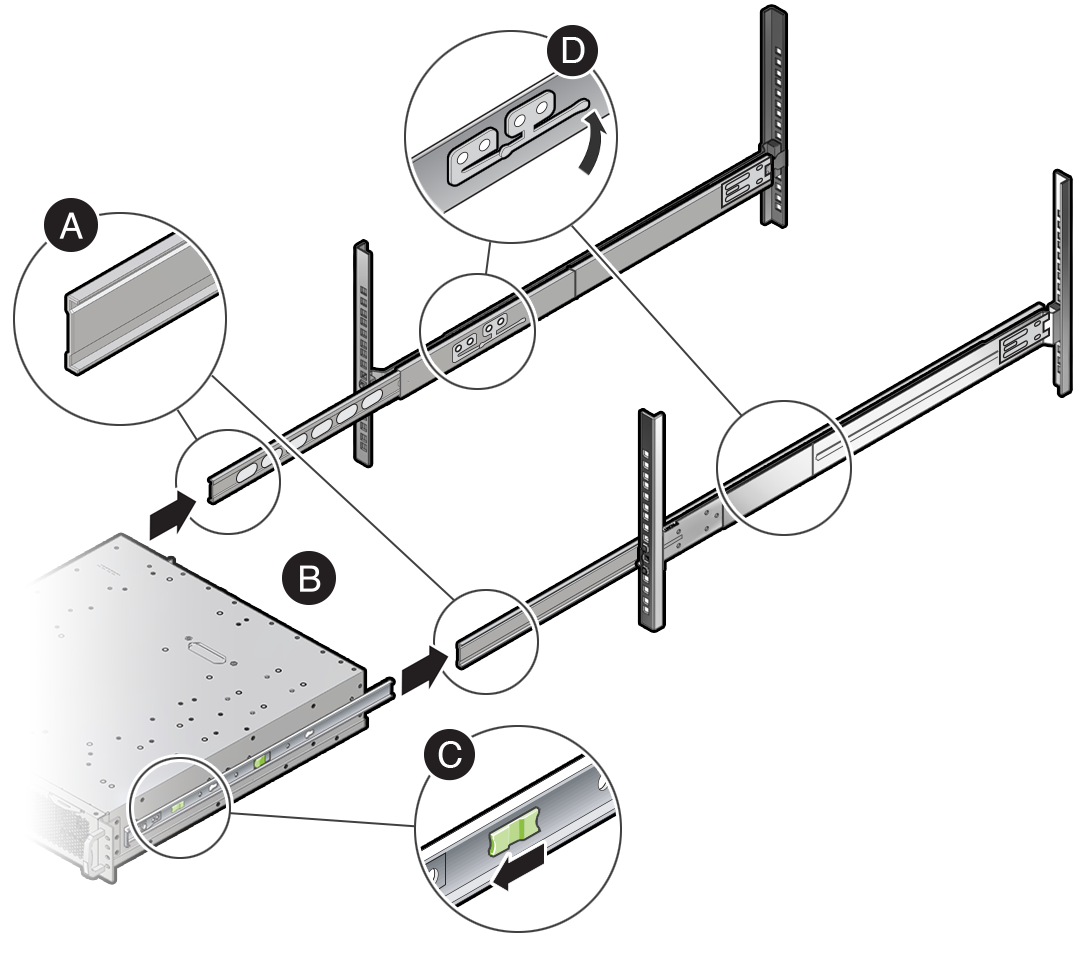
- Extend the inner-front slide-rails.
- Slide the mounting brackets into the extended slide-rails until the device is securely supported by the slide-rails, but is extended from the rack.
- Pull the green lever forward to enable the mounting brackets to slide fully into the slide-rails.
- Lift the slide-rail stop lever and push the device completely into the rack.
-
Install two M4 screws to the front of the device.
What's next?