Manage Uploads and Downloads

About Uploading and Downloading Your Data

The Upload tile in the Console enables the cloud account administrators to upload and download the following:

  • Data security assignments
  • Financial categories
  • Financial category assignments
  • User to group associations

You can upload and download only csv files.

Upload and Download Data Security Assignments

You can download security assignment template files to help you set up security assignments, and then upload the files to your environment.

You can download Sample or Current files. Sample provides a csv file with relevant headers to help familiarize you with the types of data you can expect. Current provides a list of current data assignments you can download to your test or production environments. If you need to filter your options to show specific data security contexts, use the Filter option. Regardless of the file you download, you need to populate these columns: USERNAME, SEC_OBJ_CODE, and SEC_OBI_MEMBER_VAL. Don't change any of the header names in the downloaded files. When you're done updating the files, you can upload them to your environment.

You can also download data security assignment files using the Download File button available from the Security Assignments tab on the Security page. In this case, you don't need to specifically select Data Security Assignments. Click Download File, select the type of file you want to download, and proceed with the remaining steps. You can also upload data security assignment files using the Upload button available from the Security Assignments tab on the Security page. In this case, you don't need to specifically select Data Security Assignments. Click Upload and then proceed with the remaining steps.

Note

Replace existing configuration settings deletes existing data security assignments.
Ensure that these prerequisites are in place:

  • Security assignment has 1:1 mapping with application roles.
  • Application roles are assigned to groups.
  • Users who are being assigned to a security context are part of the group that's linked to the security context through the application roles.
  1. Sign in to your service.
  2. In Oracle Fusion Data Intelligence Console, click Uploads under Application Administration.
  3. On the Uploads page, click Download File, select Data Security Assignments and then select the type of file you want to download.
  4. Open the csv file you downloaded and complete the fields as required:
    • USERNAME: The user name and user display name.
    • SEC_OBJ_CODE: The object code for which you're adding the data security assignment.
    • SEC_OBJ_MEMBER_VAL: The security assignment member for each context. See Security Object Tables.
  5. When you're done updating the file, save your changes.
  6. On the Uploads page, click Upload File and the applicable file type.
  7. Select whether you want to Merge to the existing settings or Replace existing configuration settings.
  8. Select the file you want to upload and click Upload File.
    You can review the status of the upload on the Uploads tab.
  9. Use Actions next to the file name to perform actions on a specific upload file:
    • Click Properties to check the upload statistics.
    • Click Download to download the file you just uploaded in the event you want to upload the file again.
    • Click Delete if a file fails to process and you want to remove the file history.

Security Object Tables

Use these security object codes and associated SQL to access the assignment member for each context.

Security Objects

Table 6-1 Security Object Codes

Security Object Code
AP Business Units OA4F_SEC_FIN_AP_BUSINESSUNIT_LIST
AR Business Units OA4F_SEC_FIN_AR_BUSINESSUNIT_LIST
Cost Organizations OA4F_SEC_CST_COST_ORG_LIST
FA Asset Book OA4F_SEC_FIN_FA_ASSET_BOOK_LIST
HCM Business Units OA4F_SEC_HCM_BUSINESSUNIT_LIST
HCM Country List OA4F_SEC_HCM_COUNTRY_LIST
HCM Departments OA4F_SEC_HCM_DEPARTMENT_LIST
HCM Legal Employers OA4F_SEC_HCM_LEGAL_EMPLOYER_LIST
HCM Show Self Record OA4F_SEC_HCM_SEE_SELF_RECORD
Inventory Business Units OA4F_SEC_INV_BUSINESSUNIT_LIST
Inventory Organizations OA4F_SEC_INV_ORG_TRANSACTIONS_LIST
Ledgers OA4F_SEC_FIN_LEDGER_LIST
Order Management Business Units OA4F_SEC_OM_BUSINESS_UNIT_LIST
Project Business Units OA4F_SEC_PPM_PROJECT_BUSINESSUNIT_LIST
Project Expenditure Business Units OA4F_SEC_PPM_EXPENDITURE_BUSINESSUNIT_LIST
Project Organizations OA4F_SEC_PPM_PROJECT_ORGANIZATION_LIST
Requisition Business Units OA4F_SEC_PROC_REQ_BUSINESSUNIT_LIST
Spend Procurement Business Units OA4F_SEC_PROC_SPEND_PRC_BUSINESSUNIT_LIST

Assignment Member SQL

Table 6-2 Assignment Member SQL

Security Object Code SQL Code
OA4F_SEC_CST_COST_ORG_LIST
SELECT
DISTINCT TL.ORGANIZATION_NAME AS NAME,
TL.ORGANIZATION_ID AS VALUE
FROM
DW_CST_COST_ORG_BOOKS_D D,
DW_INTERNAL_ORG_D_TL TL
WHERE
D.COST_ORG_ID = TL.ORGANIZATION_ID
AND  TL.LANGUAGE = (SELECT PARAMETER_VALUE FROM DW_CONTENT_PARAM_CONFIG WHERE PARAMETER_CODE='PARAM_GLOBAL_FAW_LANGUAGES')
AND D. COST_ORG_ID <>-99999
OA4F_SEC_FIN_AP_BUSINESSUNIT_LIST
SELECT TL.ORGANIZATION_NAME AS NAME, TL.ORGANIZATION_ID AS VALUE 
FROM DW_INTERNAL_ORG_D D, DW_INTERNAL_ORG_D_TL TL
WHERE (D.PAYABLES_INVOICING_BU_FLAG = 'Y' OR D.PAYABLES_PAYMENT_BU_FLAG = 'Y') 
AND D.ORGANIZATION_ID = TL.ORGANIZATION_ID 
AND TL.LANGUAGE = (SELECT PARAMETER_VALUE FROM DW_CONTENT_PARAM_CONFIG WHERE PARAMETER_CODE='PARAM_GLOBAL_FAW_LANGUAGES') 
AND D.ORGANIZATION_ID <> -99999
OA4F_SEC_FIN_AR_BUSINESSUNIT_LIST
SELECT TL.ORGANIZATION_NAME AS NAME, TL.ORGANIZATION_ID AS VALUE 
FROM DW_INTERNAL_ORG_D D, DW_INTERNAL_ORG_D_TL TL
WHERE (D.BILLING_REVENUE_MNG_BU_FLAG = 'Y' OR D.CUSTOMER_PAYMENTS_BU_FLAG = 'Y') 
AND D.ORGANIZATION_ID = TL.ORGANIZATION_ID 
AND TL.LANGUAGE = (SELECT PARAMETER_VALUE FROM DW_CONTENT_PARAM_CONFIG WHERE PARAMETER_CODE='PARAM_GLOBAL_FAW_LANGUAGES') 
AND D.ORGANIZATION_ID <> -99999
OA4F_SEC_FIN_FA_ASSET_BOOK_LIST
SELECT 
BOOK_TYPE_CODE AS name,
BOOK_TYPE_CODE AS value
FROM 
DW_FA_MC_BOOK_CONTROLS_D
WHERE MC_FLAG = 'N'
OA4F_SEC_FIN_LEDGER_LIST
SELECT ledger.ledger_name   AS name,        
                ledger.ledger_id     AS value 
FROM dw_ledger_d ledger 
WHERE ledger.ledger_id <> - 99999
OA4F_SEC_HCM_BUSINESSUNIT_LIST
SELECT TL.BUSINESS_UNIT_NAME AS NAME,
TL.BUSINESS_UNIT_ID AS VALUE
FROM DW_BUSINESS_UNIT_D_TL TL
WHERE TL.LANGUAGE =  (SELECT PARAMETER_VALUE FROM DW_CONTENT_PARAM_CONFIG WHERE PARAMETER_CODE='PARAM_GLOBAL_FAW_LANGUAGES')
OA4F_SEC_HCM_COUNTRY_LIST
SELECT TL.COUNTRY_NAME AS NAME, TL.COUNTRY AS VALUE 
FROM DW_COUNTRY_D_TL TL WHERE TL.LANGUAGE = (SELECT PARAMETER_VALUE FROM DW_CONTENT_PARAM_CONFIG WHERE PARAMETER_CODE='PARAM_GLOBAL_FAW_LANGUAGES')
OA4F_SEC_HCM_DEPARTMENT_LIST
SELECT TL.BUSINESS_UNIT_NAME AS NAME,
TL.BUSINESS_UNIT_ID AS VALUE
FROM DW_BUSINESS_UNIT_D_TL TL
WHERE TL.LANGUAGE =  (SELECT PARAMETER_VALUE FROM DW_CONTENT_PARAM_CONFIG WHERE PARAMETER_CODE='PARAM_GLOBAL_FAW_LANGUAGES')
OA4F_SEC_HCM_LEGAL_EMPLOYER_LIST
SELECT TL.LEGAL_EMPLOYER_NAME AS NAME, TL.LEGAL_EMPLOYER_ID AS VALUE FROM DW_LEGAL_EMPLOYER_D_TL TL WHERE LANGUAGE =  (SELECT PARAMETER_VALUE FROM DW_CONTENT_PARAM_CONFIG WHERE PARAMETER_CODE='PARAM_GLOBAL_FAW_LANGUAGES')
OA4F_SEC_HCM_SEE_SELF_RECORD
SELECT YESNO_LKP_CODE AS VALUE,
  NAME                AS NAME
FROM DW_YESNO_LKP_TL
WHERE CODE_TYPE LIKE 'FA_YESNO'
AND LANGUAGE        =  (SELECT PARAMETER_VALUE FROM DW_CONTENT_PARAM_CONFIG WHERE PARAMETER_CODE='PARAM_GLOBAL_FAW_LANGUAGES')
AND YESNO_LKP_CODE IN ( 'NO')
OA4F_SEC_INV_BUSINESSUNIT_LIST
SELECT TL.BUSINESS_UNIT_NAME AS NAME, TL.BUSINESS_UNIT_ID AS VALUE
FROM DW_BUSINESS_UNIT_D_TL TL
WHERE TL.BUSINESS_UNIT_ID IN (SELECT DISTINCT(INV_BUSINESS_UNIT_ID) FROM DW_INV_ORGANIZATION_D)
AND TL.LANGUAGE = (SELECT PARAMETER_VALUE FROM DW_CONTENT_PARAM_CONFIG WHERE PARAMETER_CODE='PARAM_GLOBAL_FAW_LANGUAGES') AND TL.BUSINESS_UNIT_ID <> '-99999'
OA4F_SEC_INV_ORG_TRANSACTIONS_LIST
SELECT INV_ORGANIZATION_NAME AS NAME, INV_ORGANIZATION_ID AS VALUE FROM DW_INV_ORGANIZATION_D_TL TL
WHERE TL.LANGUAGE = (SELECT PARAMETER_VALUE FROM DW_CONTENT_PARAM_CONFIG WHERE PARAMETER_CODE='PARAM_GLOBAL_FAW_LANGUAGES') AND TL.INV_ORGANIZATION_ID <> '-99999'
OA4F_SEC_OM_BUSINESS_UNIT_LIST
SELECT
TL.BUSINESS_UNIT_NAME AS NAME,
TL.BUSINESS_UNIT_ID AS VALUE
FROM  DW_BUSINESS_UNIT_D_TL TL
WHERE  TL.LANGUAGE = (SELECT PARAMETER_VALUE FROM DW_CONTENT_PARAM_CONFIG WHERE PARAMETER_CODE='PARAM_GLOBAL_FAW_LANGUAGES')
AND TL.BUSINESS_UNIT_ID<>-99999
OA4F_SEC_PPM_CONTRACT_BUSINESSUNIT_LIST
SELECT 
TL.ORGANIZATION_NAME AS NAME,
TL.ORGANIZATION_ID AS VALUE 
FROM 
DW_INTERNAL_ORG_D D, 
DW_INTERNAL_ORG_D_TL TL
WHERE (D.CUST_CONTRACT_MNGMNT_BU_FLAG = 'Y' AND D.BUSINESS_UNIT_FLAG = 'Y') 
AND D.ORGANIZATION_ID = TL.ORGANIZATION_ID 
AND TL.LANGUAGE = (SELECT PARAMETER_VALUE FROM DW_CONTENT_PARAM_CONFIG WHERE PARAMETER_CODE='PARAM_GLOBAL_FAW_LANGUAGES')
AND D.ORGANIZATION_ID<>-99999
OA4F_SEC_PPM_EXPENDITURE_BUSINESSUNIT_LIST
SELECT
TL.ORGANIZATION_NAME AS NAME,
TL.ORGANIZATION_ID AS VALUE
FROM
DW_INTERNAL_ORG_D D,
DW_INTERNAL_ORG_D_TL TL
WHERE (D.PROJECT_ACCOUNTING_BU_FLAG  = 'Y' AND D.BUSINESS_UNIT_FLAG = 'Y')
AND  D.ORGANIZATION_ID = TL.ORGANIZATION_ID
AND  TL.LANGUAGE = USERENV('LANG')
AND D.ORGANIZATION_ID<>-99999
OA4F_SEC_PPM_PROJECT_BUSINESSUNIT_LIST
SELECT
TL.ORGANIZATION_NAME AS NAME,
TL.ORGANIZATION_ID AS VALUE
FROM
DW_INTERNAL_ORG_D D,
DW_INTERNAL_ORG_D_TL TL
WHERE (D.PROJECT_ACCOUNTING_BU_FLAG  = 'Y' AND D.BUSINESS_UNIT_FLAG = 'Y')
AND  D.ORGANIZATION_ID = TL.ORGANIZATION_ID
AND  TL.LANGUAGE = USERENV('LANG')
AND D.ORGANIZATION_ID<>-99999
OA4F_SEC_PPM_PROJECT_ORGANIZATION_LIST
SELECT
TL.ORGANIZATION_NAME AS NAME,
TL.ORGANIZATION_ID AS VALUE
FROM
DW_INTERNAL_ORG_D D,
DW_INTERNAL_ORG_D_TL TL
WHERE (D.PROJECT_ORGANIZATION_FLAG  = 'Y' )
AND  D.ORGANIZATION_ID = TL.ORGANIZATION_ID
AND  TL.LANGUAGE = USERENV('LANG')
AND D.ORGANIZATION_ID<>-99999
OA4F_SEC_PROC_REQ_BUSINESSUNIT_LIST
SELECT
TL.ORGANIZATION_NAME AS NAME,
TL.ORGANIZATION_ID AS VALUE
FROM
DW_INTERNAL_ORG_D D,
DW_INTERNAL_ORG_D_TL TL
WHERE (D.REQUISITION_BU_FLAG  = 'Y' AND D.BUSINESS_UNIT_FLAG = 'Y')
AND  D.ORGANIZATION_ID = TL.ORGANIZATION_ID
AND  TL.LANGUAGE = (SELECT PARAMETER_VALUE FROM DW_CONTENT_PARAM_CONFIG WHERE PARAMETER_CODE='PARAM_GLOBAL_FAW_LANGUAGES')
AND D.ORGANIZATION_ID<>-99999
OA4F_SEC_PROC_SPEND_PRC_BUSINESSUNIT_LIST
SELECT
TL.ORGANIZATION_NAME AS NAME,
TL.ORGANIZATION_ID AS VALUE
FROM
DW_INTERNAL_ORG_D D,
DW_INTERNAL_ORG_D_TL TL
WHERE (D.PROCUREMENT_BU_FLAG = 'Y' AND D.BUSINESS_UNIT_FLAG = 'Y')
AND  D.ORGANIZATION_ID = TL.ORGANIZATION_ID
AND  TL.LANGUAGE = (SELECT PARAMETER_VALUE FROM DW_CONTENT_PARAM_CONFIG WHERE PARAMETER_CODE='PARAM_GLOBAL_FAW_LANGUAGES')
AND D.ORGANIZATION_ID<>-99999
OA4F_SEC_SCM_MFGORG_LIST
SELECT
MFG_ORGANIZATION_NAME AS NAME, 
MFG_ORGANIZATION_ID AS VALUE
FROM
DW_MFG_ORGANIZATION_D_TL TL
WHERE TL.LANGUAGE = (SELECT PARAMETER_VALUE FROM DW_CONTENT_PARAM_CONFIG WHERE PARAMETER_CODE='PARAM_GLOBAL_FAW_LANGUAGES')
AND TL.MFG_ORGANIZATION_ID <> '-99999'
OA4F_SEC_SCM_MNTORG_LIST
SELECT
INV_ORGANIZATION_NAME AS NAME,
INV_ORGANIZATION_ID AS VALUE
FROM
DW_INV_ORGANIZATION_D_TL TL
WHERE TL.LANGUAGE = (SELECT PARAMETER_VALUE FROM DW_CONTENT_PARAM_CONFIG WHERE PARAMETER_CODE='PARAM_GLOBAL_FAW_LANGUAGES')
AND TL.INV_ORGANIZATION_ID <> '-99999'

Upload and Download Financial Categories

You can download financial category template files to help you set up financial categories, and then upload the files to your environment.

You can download Sample or Current files. Sample provides a csv file with relevant headers to help familiarize you with the types of data you can expect. Current provides a list of current data assignments you can download to your test or production environments. Regardless of the file you download, you need to populate the FINANCIAL_CATEGORY column. Don't change any of the header names in the downloaded files. When you're done updating the files, you can upload them to your environment.
Note

Replace existing configuration settings deletes existing data security assignments.
  1. Sign in to your service.
  2. In Oracle Fusion Data Intelligence Console, click Uploads under Application Administration.
    You see the Uploads page.
  3. On the Uploads page, click Download File, select Financial Categories and then select the type of file you want to download.
  4. Open the csv file you downloaded and populate the fields as required:
    • FINANCIAL_CATEGORY: The financial category code.
  5. When you're done updating the file, save your changes.
  6. On the Uploads page, click Upload File and the applicable file type.
  7. Select whether you want to Merge to the existing settings or Replace existing configuration settings.
  8. Select the file you want to upload and click Upload File.
    You can review the status of the upload on the Uploads tab.
  9. Use Actions next to the file name to perform actions on a specific upload file:
    • Click Properties to check the upload statistics.
    • Click Download to download the file you just uploaded in the event you want to upload the file again.
    • Click Delete if a file fails to process and you want to remove the file history.

Upload and Download Financial Category Assignments

You can download financial category assignment template files to help you set up financial categories, and then upload the files to your environment.

You can download Sample or Current files. Sample provides a csv file with relevant headers to help familiarize you with the types of data you can expect. Current provides a list of current data assignments you can download to your test or production environments. Prior to download a file, you must select the segment combination you want to use to map your financial categories in the Select Columns dialog. The list prepopulates the segments defined in your chart of accounts that are BI enabled. Regardless of the file you download, you need to populate the FINANCIAL_CATEGORY column. Don't change any of the header names in the downloaded files. When you're done updating the files, you can upload them to your environment.
Note

Replace existing configuration settings deletes existing data security assignments.
  1. Sign in to your service.
  2. In Oracle Fusion Data Intelligence Console, click Uploads under Application Administration.
    You see the Uploads page.
  3. On the Uploads page, click Download File, select Financial Category Assignments and then select the type of file you want to download.
  4. Open the csv file you downloaded and populate the fields as required:
    • CHART_OF_ACCOUNTS – Name of your chart of accounts.
    • Actual segment values.
    • FINANCIAL_CATEGORY: The financial category code. This can be a predefined category or a custom category defined using the Financial Categories upload option.
  5. When you're done updating the file, save your changes.
  6. On the Uploads page, click Upload File and the applicable file type.
  7. Select whether you want to Merge to the existing settings or Replace existing configuration settings.
    Note

    If you want to change the segment combination for your financial category definition, then ensure to provide the data for all chart of accounts and use the replace option. The data is completely replaced. Different segment combinations for different chart of accounts is NOT supported.
  8. Select the file you want to upload and click Upload File.
    You can review the status of the upload on the Uploads tab.
  9. Use Actions next to the file name to perform actions on a specific upload file:
    • Click Properties to check the upload statistics.
    • Click Download to download the file you just uploaded in the event you want to upload the file again.
    • Click Delete if a file fails to process and you want to remove the file history.

Upload and Download User Group Mappings

You can download user group mapping template files to help you set up user group mappings, and then upload the files to your environment.

Tutorial icon LiveLabs Sprint

You can download "Sample" or "Current" files. Sample provides a csv file with relevant headers to help familiarize you with the types of data you can expect. Current provides a list of current data assignments you can download to your test or production environments. Regardless of the file you download, you need to populate the USERNAME and GROUPNAME columns. Use the Operation column to make bulk changes to the user group mappings. Don't change any of the header names in the downloaded files. When you're done updating the files, you can upload them to your environment.

  1. Sign in to your service.
  2. In Oracle Fusion Data Intelligence Console, click Uploads under Application Administration.
  3. On the Uploads page, click Download File, select User Group Mapping, and then select the type of file you want to download.
  4. Open the csv file you downloaded and complete the fields as required:
    • USERNAME: The username in Oracle Identity Cloud Service.
    • GROUPNAME: The group name in Oracle Identity Cloud Service.
    • OPERATION: Enter ADD or leave it blank to add the user group mappings or enter REMOVE to remove the user group mappings.
  5. When you're done updating the security file, save your changes.
  6. On the Uploads page, click Upload File and then select the applicable file type.
  7. Select the file you want to upload and click Upload File.
    You can review the status of the upload on the Uploads tab.
  8. Use Actions next to the file name to perform actions on a specific upload file:
    • Click Properties to check the upload statistics.
    • Click Download to download the file you just uploaded in the event you want to upload the file again.
    • Click Delete if a file fails to process and you want to remove the file history.

Download and Upload Area of Responsibility Data

If you use Oracle Fusion HCM Analytics, then you can manage the area of responsibility (AOR) data in the Oracle Autonomous Data Warehouse associated with the Oracle Fusion Data Intelligence instance for security setups.

You can use the AOR-related data in custom security setups and for mass assignment. You can download the latest AOR data security assignment files to make changes to the existing data and upload it back. This enables you to avoid using other methods to get the AOR data into Oracle Autonomous Data Warehouse.

The downloaded AOR data security assignment file supports only the prebuilt security contexts. For custom contexts, you can utilize the AOR data available in the DW_ASG_RESPONSIBILITY_D table while configuring custom security. The format of the AOR file that you download is different from the data security assignment file that you can upload, hence you must copy the required columns from the AOR file to the security assignment file prior to uploading it as the AOR-related security assignment file. For example, the AOR file has additional columns like AOR TYPE, which is for your reference only.

When you run the data pipeline for the Area of Responsibility functional area after activating it, Oracle Fusion Data Intelligence loads the AOR-related data from the DW_ASG_RESPONSIBILITY_D view, transforms it, and uses this data to populate the AOR file. The data in the AOR-related downloadable file is formatted as per the current data security assignment .csv file and pertains to the prebuilt security contexts of business unit, country, legal entity, and organization.

After uploading the security assignments data to Oracle Autonomous Data Warehouse, if the AOR assignment ends, then you must download the AOR and data security assignment files, compare mismatches between the two files, and take necessary actions of adding or removing contexts from the data security context and upload the correct data as and when required. The AOR file has only the current effective records; hence any end-dated record won’t be available in this file.

Note

Replace existing configuration settings deletes existing data security assignments.
  1. Sign in to your service.
  2. In Oracle Fusion Data Intelligence Console, click Uploads under Application Administration.
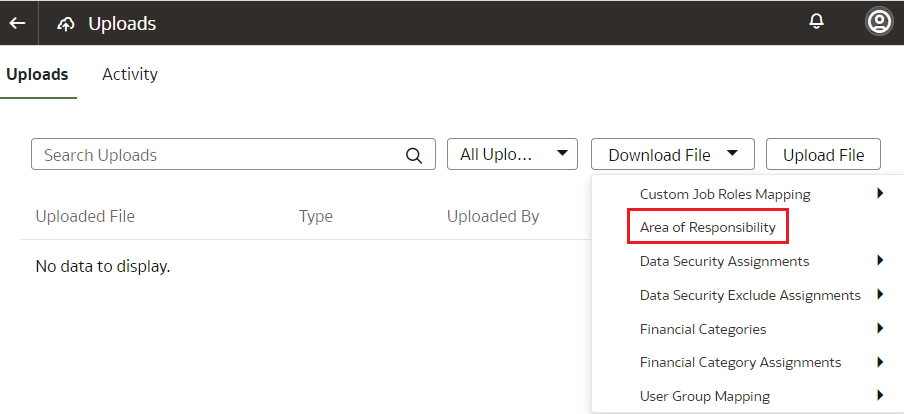
  3. On the Uploads page, click Download File and select Area of Responsibility.

    Download Area of Responsibility file

  4. Unzip the DataSecurityAssignmentAOR_csv.zip file you downloaded and edit the csv file as required.
    When you are done updating the file, save your changes.
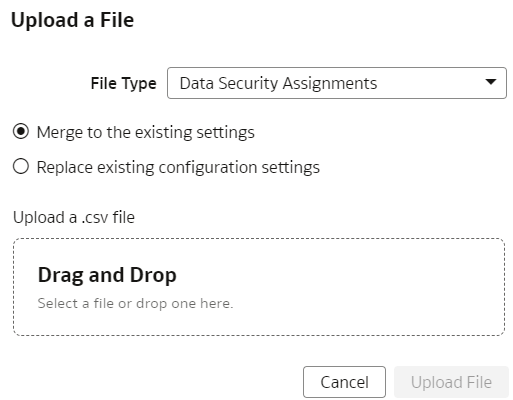
  5. On the Uploads page, click Upload File and select Data Security Assignments in File Type.

    Upload Area of Responsibility file

  6. Select whether you want to Merge to the existing settings or Replace existing configuration settings.
  7. Select the file you want to upload and click Upload File.
    You can review the status of the upload on the Uploads tab.
  8. Use Actions next to the file name to perform actions on a specific upload file:
    • Click Properties to check the upload statistics.
    • Click Download to download the file you just uploaded in the event you want to upload the file again.
    • Click Delete if a file fails to process and you want to remove the file history.

Download and Upload Data Security Exclusion Rules

If you want to automate the application of the security exclusion rules, then download the file to make the changes and upload it.

Note

Replace existing configuration settings deletes existing data security assignments.
  1. Sign in to your service.
  2. In Oracle Fusion Data Intelligence Console, click Uploads under Application Administration.
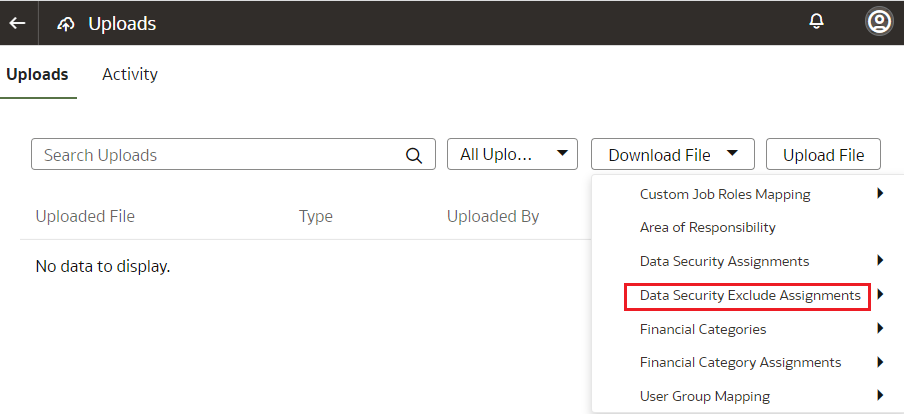
  3. On the Uploads page, click Download File and select Data Security Exclude Assignments, and then select the sample or current type of file that you want to download.

    Download Data Security Exclude Assignments file

  4. Unzip the DataSecurityExclusionAssignments_csv.zip file you downloaded and edit the csv file as required.
    When you're done updating the file, save your changes.
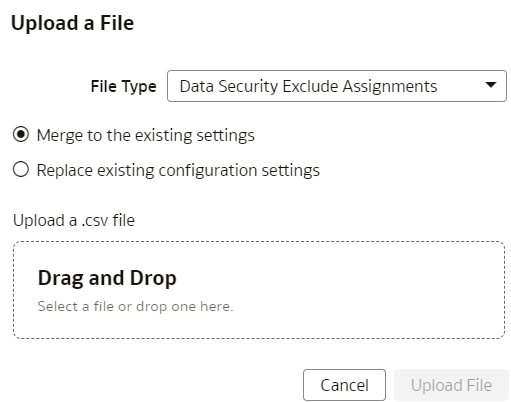
  5. On the Uploads page, click Upload File and select Data Security Exclude Assignments in File Type.

    Upload Data Security Exclude Assignments file

  6. Select whether you want to Merge to the existing settings or Replace existing configuration settings.
  7. Select the file you want to upload and click Upload File.
    You can review the status of the upload on the Uploads tab.
  8. Use Actions next to the file name to perform actions on a specific upload file:
    • Click Properties to check the upload statistics.
    • Click Download to download the file you just uploaded in the event you want to upload the file again.
    • Click Delete if a file fails to process and you want to remove the file history.

Download and Upload Custom Job Roles Mappings

If you've custom job roles in Oracle Fusion Cloud Applications and want to use them as data and duty roles in Oracle Fusion ERP Analytics, then you can map the job roles to the data and duty roles, and upload the mappings.

Oracle Fusion Data Intelligence uses the mappings to apply the security assignments to the applicable Oracle Fusion Cloud Applications users in Oracle Fusion Data Intelligence during the automatic synchronization of the data security assignment configurations between Oracle Fusion Cloud Applications and Oracle Fusion Data Intelligence.

During the next data pipeline run, Oracle Fusion Data Intelligence applies this mappings.
Note

Replace existing configuration settings deletes the existing custom role mappings.
  1. Sign in to your service.
  2. In Oracle Fusion Data Intelligence Console, click Uploads under Application Administration.
  3. On the Uploads page, click Download File and select Custom Job Roles Mapping, and then select the sample or current type of file that you want to download.

    Download Custom Job Roles Mapping file

  4. Unzip the CustomRoleMapping_csv file you downloaded and create the mapping by entering the Oracle Fusion Cloud Applications jobe role in the FA_JOB_ROLE column and a corresponding Oracle Fusion Data Intelligence data or duty role in the FAW_ROLE column.
    When you're done updating the file, save your changes.
  5. On the Uploads page, click Upload File and select Custom Job Roles Mapping in File Type.

    Upload Custom Job Roles Mapping file

  6. Select whether you want to Merge to the existing settings or Replace existing configuration settings.
  7. Select the file you want to upload and click Upload File.
    You can review the status of the upload on the Uploads tab.
  8. Use Actions next to the file name to perform actions on a specific upload file:
    • Click Properties to check the upload statistics.
    • Click Download to download the file you just uploaded in the event you want to upload the file again.
    • Click Delete if a file fails to process and you want to remove the file history.