Manage Master Encryption Keys in AWS Key Management Service

Autonomous Database supports customer-managed Transparent Data Encryption (TDE) keys that reside in AWS Key Management Service (KMS).

Prerequisites to Use Customer-Managed Encryption Keys in AWS Key Management Service

Describes prerequisite steps to use customer-managed master encryption keys that reside in Amazon Web Services (AWS) Key Management Service (KMS) on Autonomous Database.

Limitations:
  • AWS KMS is only supported in commercial regions.
  • Cross-tenancy access, where the Autonomous Database instance and AWS KMS are in different tenancies, is not supported.
  • AWS KMS is not supported in cross-region standbys.
  • AWS KMS is not supported in refreshable clones.

Follow these steps:

  1. Create an AWS policy that grants read access to AWS KMS.

    See Creating an IAM policy to access AWS KMS for instructions, and Perform AWS Management Prerequisites to Use Amazon Resource Names (ARNs) for more information.

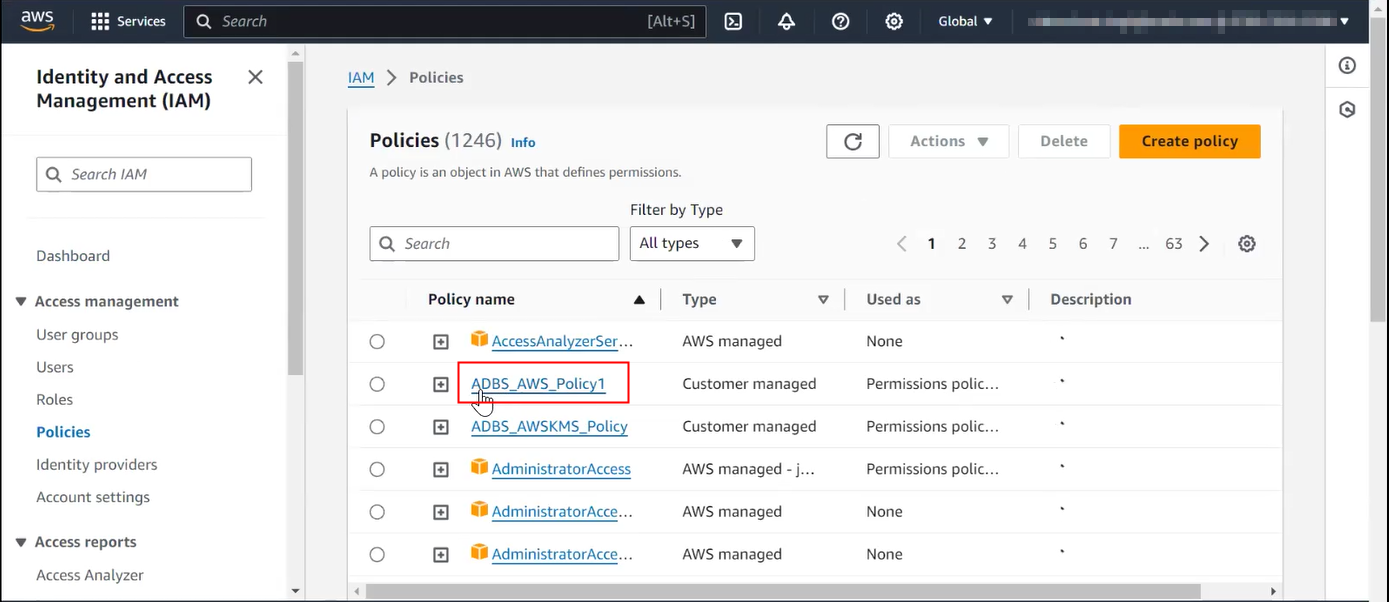
    For example, the ADBS_AWS_Policy1 policy has been created:
    Description of sec_aws_policy.png follows

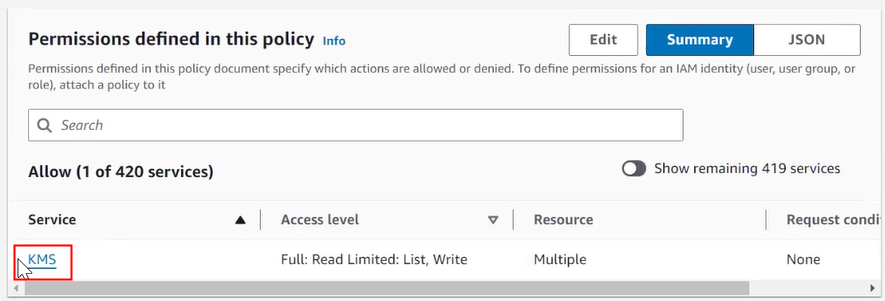
    The ADBS_AWS_Policy1 policy includes permission to access KMS.
    Description of sec_aws_perm.png follows

  2. Create an AWS role and attach the policy to the role.

    See Creating an IAM role to access AWS services for instructions.

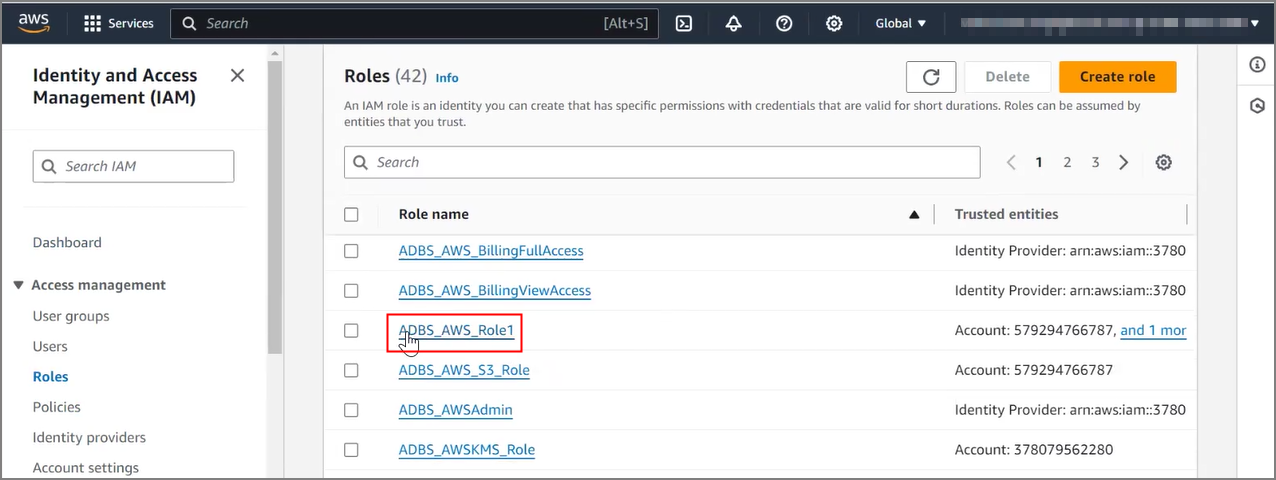
    For example, an ADBS_AWS_Role1 role has been created:


    Description of sec_aws_role.png follows

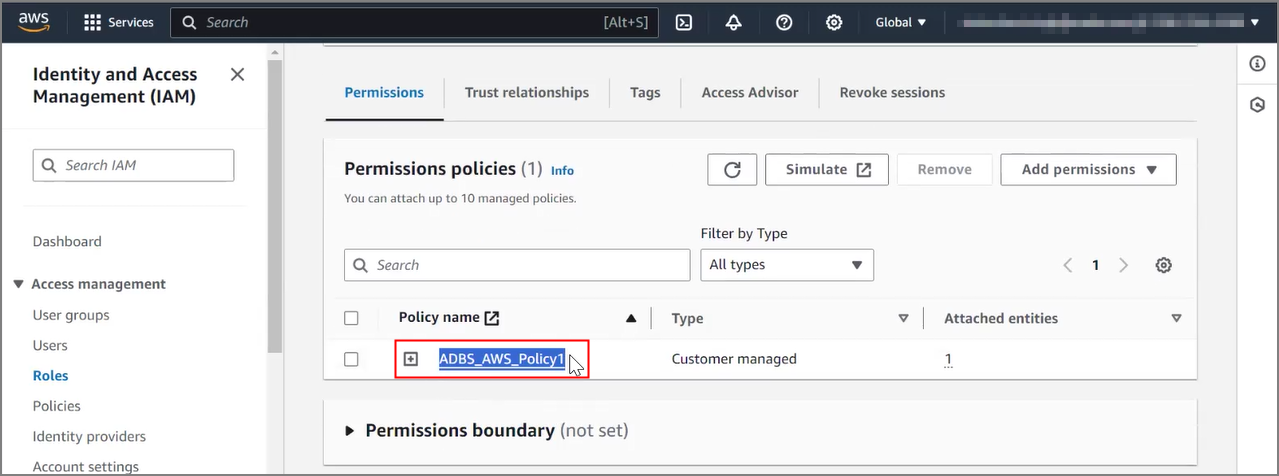
    In this example, the ADBS_AWS_Policy1 policy is attached to the ADBS_AWS_Role1 role:


    Description of sec_aws_att_policy.png follows

    On the policy details page, for this example, the role is listed under Attached as permissions policy:


    Description of sec_aws_att_role.png follows

  3. Specify a Trust Relationship for the role.

    Edit the AWS Role’s Trust Relationship to include Oracle’s User ARN, and an External ID (tenancy OCID) for additional security.

    1. On Autonomous Database query CLOUD_INTEGRATIONS.

      For example:

      SELECT * FROM CLOUD.INTEGRATIONS;
      SELECT * FROM CLOUD_INTEGRATIONS;
      
      PARAM_NAME        PARAM_VALUE
      --------------- ------------------------------------------------------------------------------------------------------------------------------------------
      aws_arn           arn:aws:iam:…:user/oraclearn

      The view CLOUD_INTEGRATIONS is available to the ADMIN user or to a user with DWROLE role.

    2. Copy the PARAM_VALUE for aws_user_arn and save the value for a subsequent step.
    3. Get the tenancy OCID, needed for the External ID.

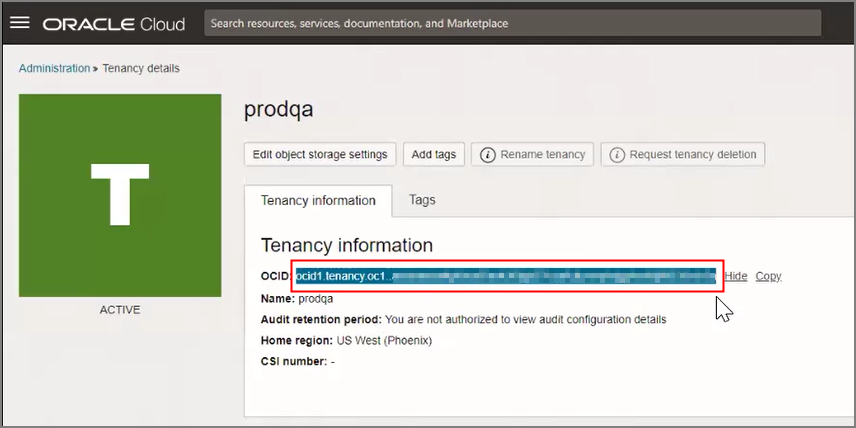
      In the OCI console, click on your Profile, and select Tenancy to go to the tenancy details page. Copy the tenancy OCID and save it for a subsequent step.

      For example:


      Description of sec_aws_ocid.png follows

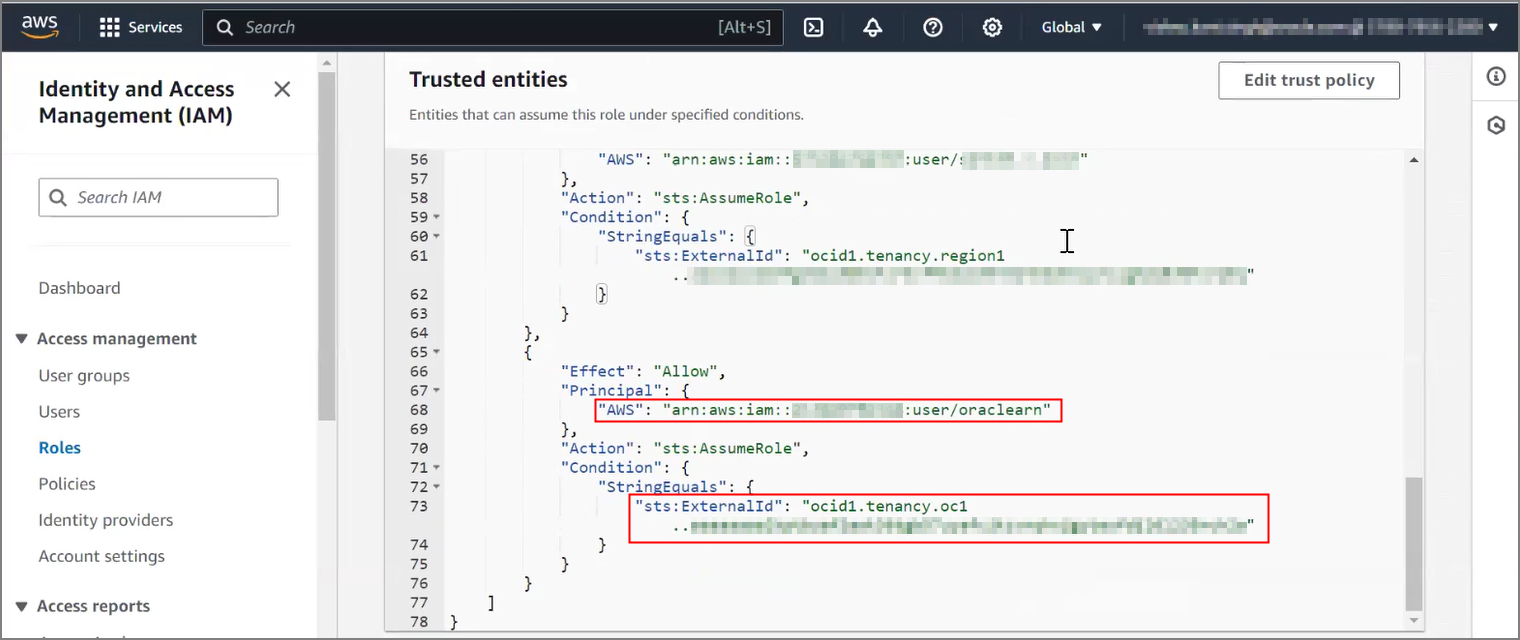
    4. On the AWS portal, navigate to the Trusted entities for the role, and scroll to the "Principal" statement.
    5. For "Principal" specify "AWS" as the saved Oracle User ARN and for "Condition" specify "sts:ExternalId" as the saved OCID.

      For example:


      Description of sec_aws_trustrel.png follows

Use Customer-Managed Encryption Keys on Autonomous Database with AWS Key Management Service

Shows the steps to encrypt your Autonomous Database using customer-managed master encryption keys that reside in AWS Key Management Service (KMS).

Follow these steps:

  1. Perform the required customer-managed encryption key prerequisite steps as necessary. See Prerequisites to Use Customer-Managed Encryption Keys in AWS Key Management Service for details.
  2. Create an Autonomous Database instance that uses the default Encryption key setting of Encrypt using an Oracle-managed key. See Provision an Autonomous Database Instance for more information.
    Note

    Encryption key settings for customer-managed keys in AWS Key Vault are not available during the Autonomous Database instance creation process. The options are available post provisioning, when editing the instance.
  3. On the Details page for the Autonomous Database instance, click More actions, and select Manage encryption key.
    Note

    If you are already using customer-managed keys in AWS KMS and you want to rotate the TDE keys, follow these steps and select a different key (select a key that is different from the currently selected master encryption key).
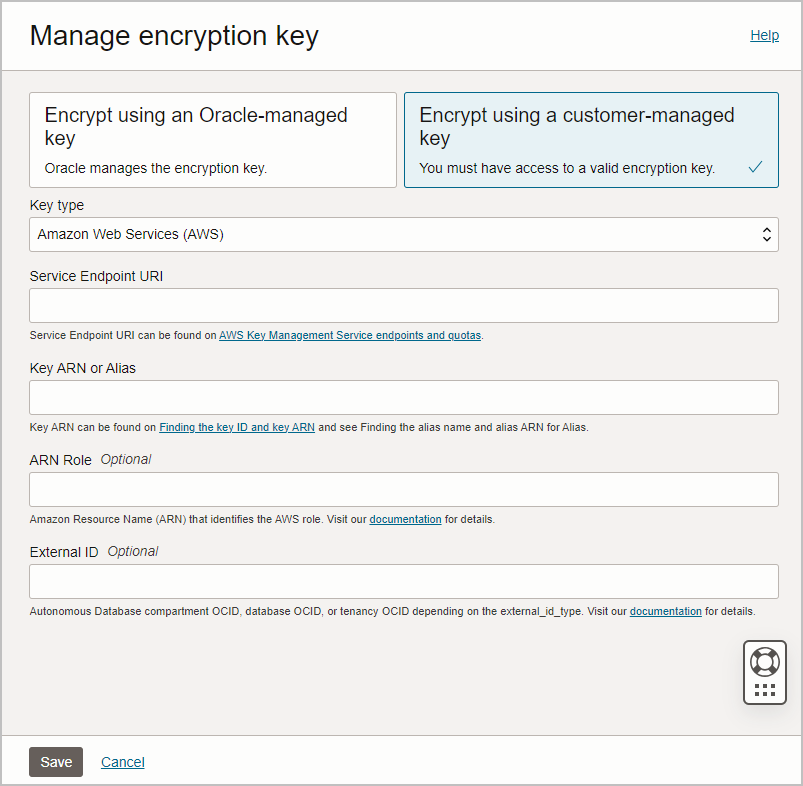
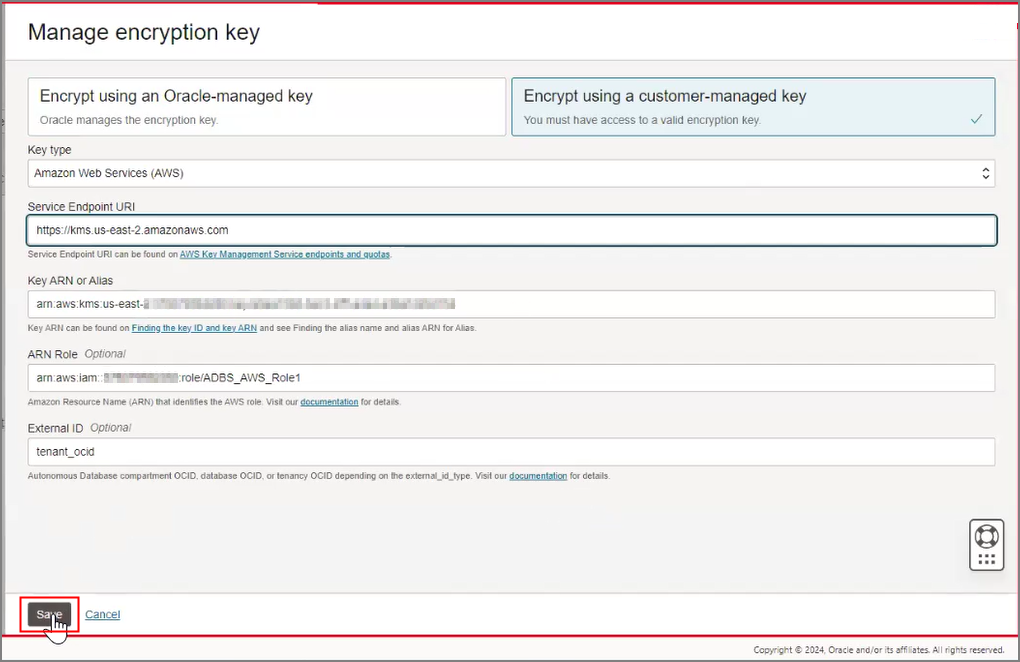
  4. On the Manage encryption key page, select Encrypt using a customer-managed key.
  5. From the Key type drop-down, select Amazon Web Services (AWS).

    Description of sec_aws.png follows

  6. Enter the Service Endpoint URI.

    The Service Endpoint URI is the AWS region where the AWS KMS is located.

    1. Go to the AWS portal, navigate to the KMS where your key is located.
    2. Find the region name listed in the top bar of the portal.

      For example, this KMS is in the region named Ohio:


      Description of sec_aws_region.png follows

    3. Look up the endpoint corresponding to the region. Go to AWS Key Management Service endpoints and quotas and find the endpoint for the AWS region name where your AWS KMS is located.

      For example, if the AWS region name is Ohio the endpoint is kms.us-east-2.amazonaws.com.

    4. Enter the endpoint for the Service Endpoint URI.
  7. Enter the Key ARN or Alias.
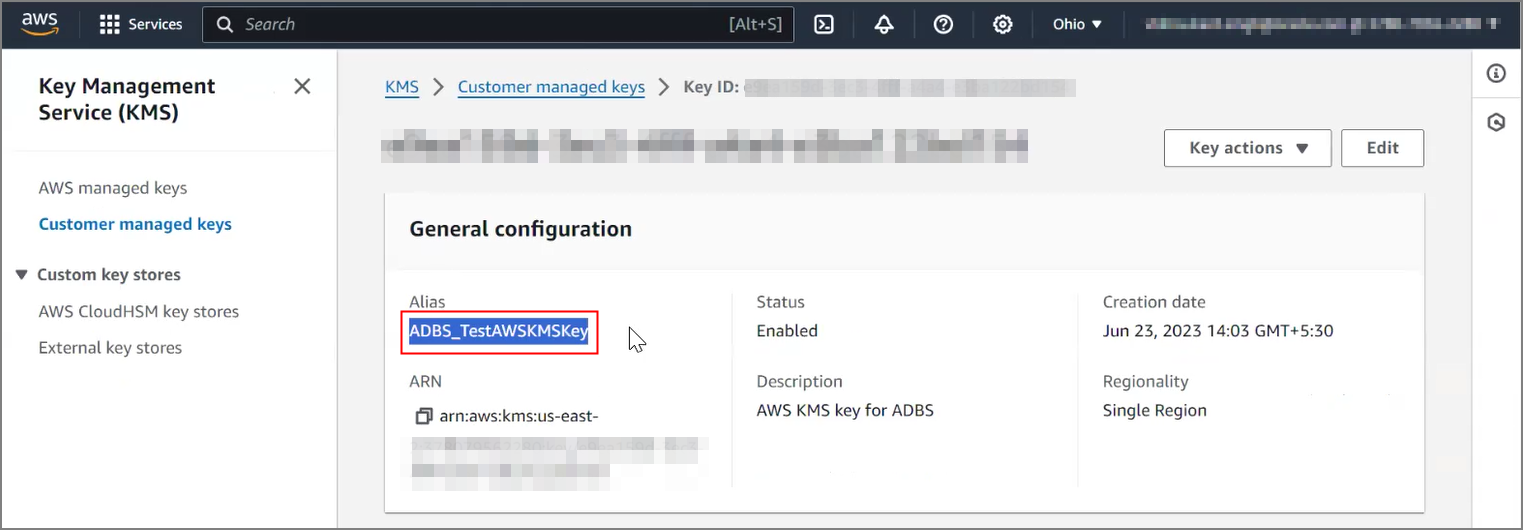
    1. Navigate to the key details page on the AWS portal. Copy the key's Alias or ARN.

      For example, the alias for ADBS_TestAWSKMSKey is selected:


      Description of sec_aws_alias.png follows

    2. Enter the key's Alias or ARN into the Key ARN or Alias field.
      If entering the Alias, prefix the entry with alias/. For example, if the alias is ADBS_TestAWSKMSKey enter:
      alias/ADBS_TestAWSKMSKey
      If entering the ARN, no prefix is needed. For example, if the ARN is arn.aws.kms.us-east-2:37807956...bd154 enter:
      arn.aws.kms.us-east-2:37807956...bd154
  8. Enter ARN Role (Optional).
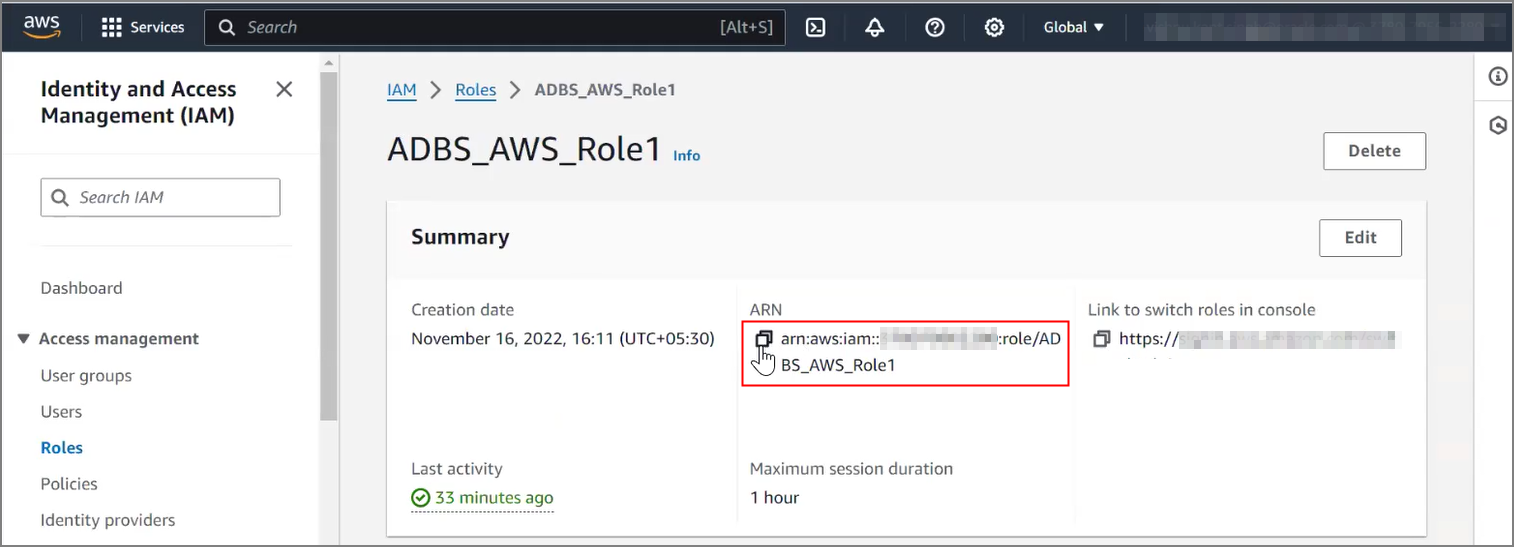
    1. Navigate to the role details page on the AWS portal.
    2. Copy the role's ARN.

      For example, the ARN for ADBS_AWS_Role1 is copied:


      Description of sec_aws_arn_role.png follows

    3. Enter the copied ARN into the ARN Role field.
  9. Enter External ID (Optional).

    For the External ID, enter tenant_ocid.

  10. Click Save.

    For example:


    Description of sec_aws_save.png follows

The Lifecycle State changes to Updating. When the request completes, the Lifecycle State shows Available.

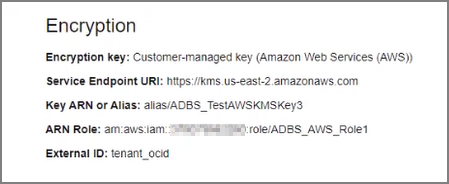
After the request completes, on the Oracle Cloud Infrastructure Console, the key information shows on the Autonomous Database instance details page under the heading Encryption.

For example:


Description of sec_aws_done.png follows