Get Started with the Visual Flow Designer
Here's a quick set of steps to get started with the Visual Flow Designer.
Create the Visual Designer Flow Skill
- Click + New Skill in the skills landing page.
- Choose Visual as the dialog mode.
Note
The platform version must be set to 22.04 or later for this option to be available. - Create intents and entities. You will need to have these in place before you create variables and intent flows.
- Click Flows
 in the left navbar. The editor opens to the Main Flow, where you set and manage the configuration for
the entire skill. Among other things, you use its Skill Variables page to add
the variables that are shared across flows and its Events page to create and
manage the mappings of transactional flows to intents and the mapping of utility
flows to built-in events that handle unresolved intents, dialog errors, and
presenting answer intents.
Map Events
You can add, edit, or delete mappings from the Main Flow's Event's page. You can
various types of events to existing flows using the mapping dialog. 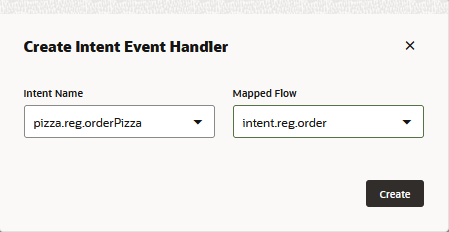
Description of the illustration df-2-0-event-mapping-dialog.png
You access this dialog by clicking ![]() .
. 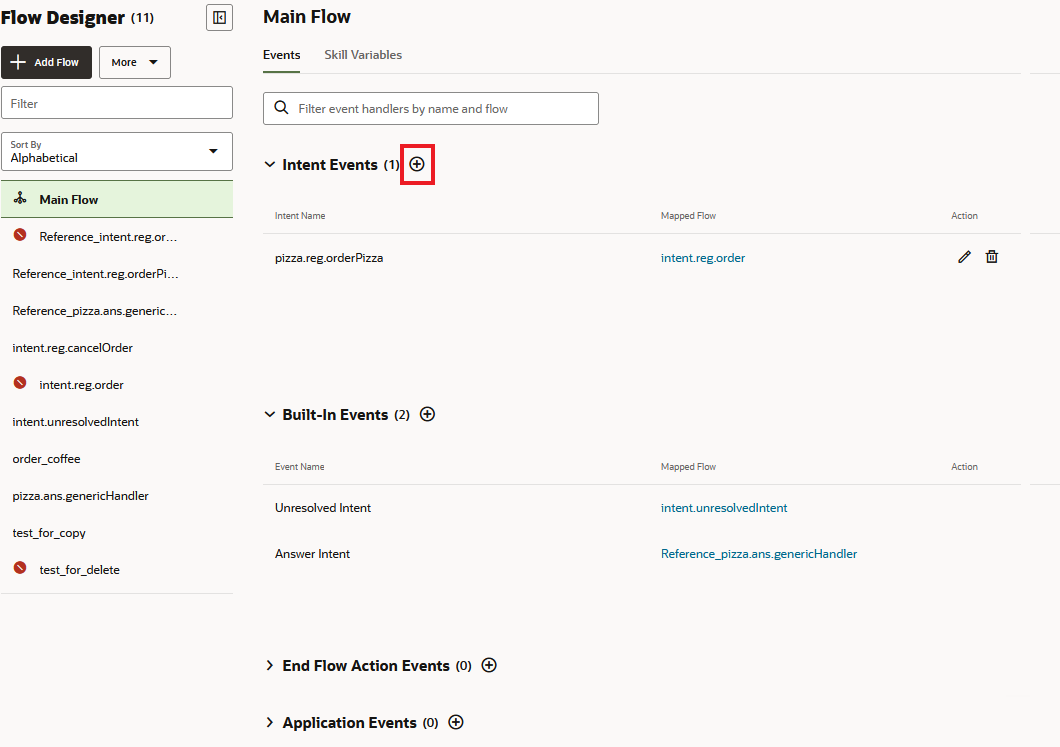
Description of the illustration df-2-0-event-mappings-page.png
Build an Intent Event Flow
Here you create flows to map to specific intents in your skill. Intent flows are typically mapped to regular intents, though you can also create them for answer intents.
To create an intent event flow:
- Create the corresponding intent and any entities that will be referenced
within the flow.
For example, if you're creating a pizza skill, you might create the following artifacts:
- An orderPizza intent.
- A value list PizzaTopping entity.
- Train the skill.
- Get started with the flow:
- Click Flows in the left navbar, then click + Add Flow.
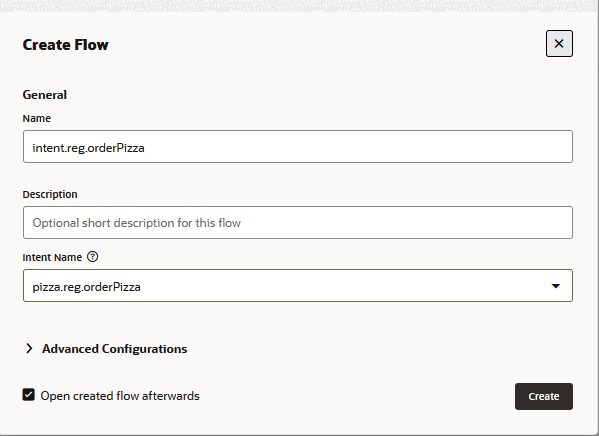
- Enter a flow name, then select the name of the intent that's
mapped to this flow. Then click Create.
Note
You can only choose from the available flow.
- Create any variables that are used within the flow:
- Open the Configuration tab. Then click + Add Variable.
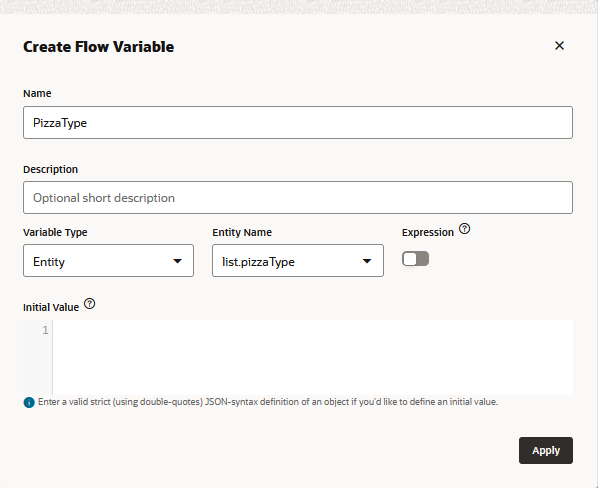
- Select the variable type. If the variable references an entity,
complete the dialog by naming the variable for the selected entity. Then
click Apply.Note
Within a flow, a variable and an output parameter can share the same name. However, variables and output parameters cannot have the same names as input parameters.
- Build the flow:
- Open the Flow tab.
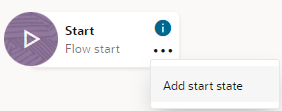
- Click the menu
 in the flow start, then click Add Start
State to open Add State dialog.
- Select a state from the component picker, then click Insert.
- Open the state's property inspector to configure the component.
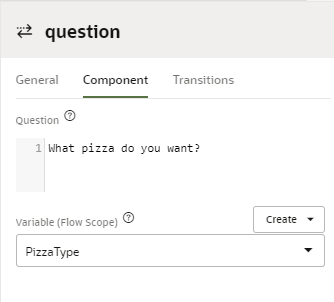
- Select Ask Question then click Insert.
- Open the Component tab in the question state's property window.
- Add a question ("What pizza do you want?", for example). Then
select the flow variable.
Tip:
Use resource bundles for all user-facing text in your skill. - Add another state after the question by clicking the menu.

- Choose Send Message and then click Insert.
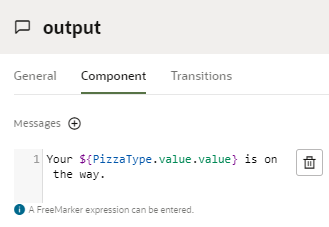
- In the property window for the send message state, enter a
confirmation message with a FreeMarker expression that accesses the flow
variable using the
${varName.value.value}syntax. For example:
If you're referencing a a flow-level composite bag entity, use theYour ${PizzaType.value.value} pizza is on the way.${cbVarName.value.itemName.<attribute>}syntax.After you've added states to the flow, you can reassign the start state by clicking the menu
 , then choosing Make start state.
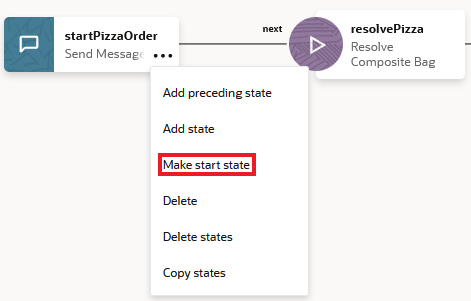
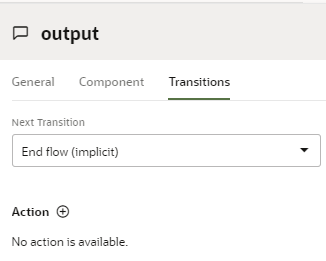
Description of the illustration df-2-0-make-start-state.png - Open the Transitions tab of the output
component's property inspector. Note that End flow
(implicit) is selected as the transition. Because this flow has
no required output parameters, the transition to the implicit End flow will
suffice. However, if this flow had one more required output parameters, then the
output state would have to transition to an actual End flow state (inserted by
clicking Flow Control > End
Flow in the Add State dialog) that specifies the flow's output
parameter(s).
Reference Variable Values in FreeMarker Expressions
Use ${varName.value.value} to reference a value list
entity. Because entities are resolved as JSON objects, the first .value
returns the JSON object and the second .value returns the value of a
property in that JSON object. To return the value of the entity in the primary language
of the skill, use ${varName.value.primaryLanguageValue}.
${cbVarName.value.itemName.value} for value list items and
{cbVarName.value.itemName} for non-value list items.
- When an item is a value list, use a value property:
${cbVarName.value.itemName.value}or${cbVarName.value.itemName.primaryLanguageValue}. - For non-value list items, you do not access the item with a value
property (no
.valueor.primaryLanguageValue). For example, if you're referencing a DATE entity whose item name isdatein the composite bag, you'd use${cbVarName.value.date}. For a NUMBER entity item (number), you'd use${cbVarName.value.number}.
skill. For example, the following expression references an item
(Type) in a composite bag entity (Order) that's
shared across
flows:${skill.Order.value.Type.value}skill
is not required in expressions for flow-scoped
variables:${Order.value.Type.value}Tip:
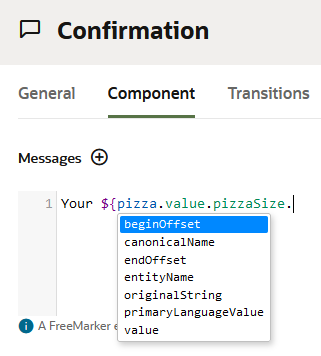
Autocompletion makes writing Apache FreeMarker expressions less error-prone.Build a Flow for Built-In Events
You'll likely want to have utility flows for built-in events like handling unresolved intents, dialog errors, and presenting answer intents. You map these flows to built-in events in the main flow. In general, the flows mapped to built-in events get invoked when there is no active intent-level flow, such as when the skill starts, or when an intent flow terminates with an end flow state.
For example, to create a generic flow that handles all answer intents:
- Create or import an answer intent and then train the skill.
- Click Flows, then click + Add Flow.
- Enter a flow name for the answer intent flow, then click Create.
- Click the menu
 in the flow start, then click Add Start State to
open the Add State dialog.
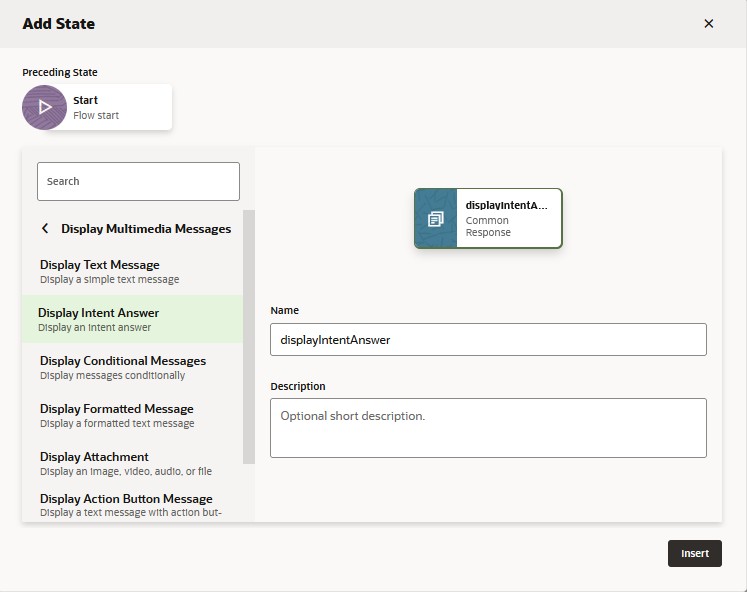
- Add a display intent answer state by selecting User
Messaging > Display text and multimedia
messages > Display intent answer, or by
entering intent answer in the Search field. Then click
Insert.
Tip:
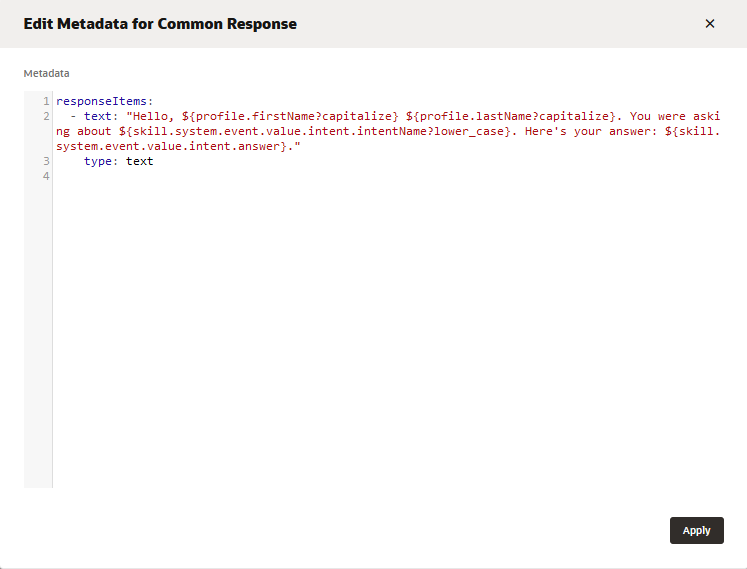
You use the search field to locate a state template. - Click the display intent answer state to open the Component tab of the property inspector, then click Edit Response Items.
- Update the text message, incorporating the template FreeMarker
expression that accesses the answer intent message
(
"${skill.system.event.value.intent.answer}"). For example:"Hello, ${profile.firstName?capitalize} ${profile.lastName?capitalize}. You were asking about ${skill.system.event.value.intent.intentName?lower_case}. Here's your answer: ${skill.system.event.value.intent.answer}."Note
- Click Apply.
- Click Main Flow.
- Click
 next to the Built-In Events.
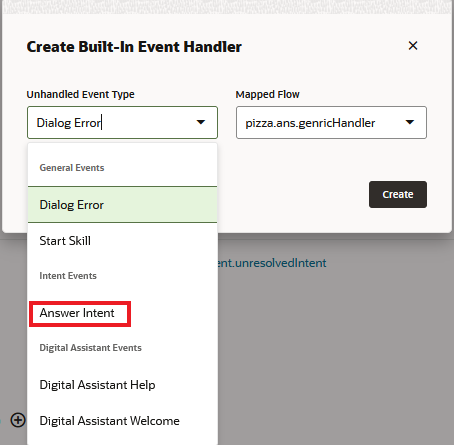
- Complete the Create Built-In Event Handler dialog:
- Select Answer Intent (located under Intent Events)
from the Unhandled Event Type dropdown.
- Select the answer intent flow from the Mapped Flow dropdown.
- Select Answer Intent (located under Intent Events)
from the Unhandled Event Type dropdown.
- Click Create.
The dialog error event flow can exist at both the skill and flow levels. The skill-level dialog error flow, which is mapped to the Dialog Error built-in event, acts as a fallback in the absence of an error-handling flow mapped to the flow-level Dialog Error event. If your skill does not have any dialog error flows at all, then the skill outputs the default error message (Oops! I’m encountering a spot of trouble).
Sample Messages for Built-In Event Flows
| Built-in Event | Expression Syntax and Examples |
|---|---|
| Answer Intent | Use the following syntax for a generic flows that
handle all answer intents for the
skill:For example: Hello,
|
| Dialog Error | Use the following syntax for dialog error
messages:An error occurred while processing your
order: |
