Export and Import Design-Time Metadata Between Instances

You can export and import archives of integration and process design-time metadata between instances. This feature can be useful if you want to take a snapshot of a production environment and try to recreate a problem in a different environment, move metadata from an instance in one region to an instance in another region, perform manual archives, or automate your environment to archive daily to a repository such as Git. You can also export Oracle Integration archives and import them into Oracle Integration Generation 2.

Note

  • Ensure that you first configure the Swift URL location and username and password credentials of the object storage bucket instance to which to export an archive of your design-time metadata on the Instance Storage page. See Configure the Instance Object Storage Bucket.
  • You cannot pick specific integrations to export. All integrations in the service instance are exported.
Create an Export Job

You create an export job that consists of an archive file of design-time metadata that you want to export to the object storage bucket you configured on the Instance Storage page.

  1. On the Home page, select Settings > Import/Export in the navigation pane.

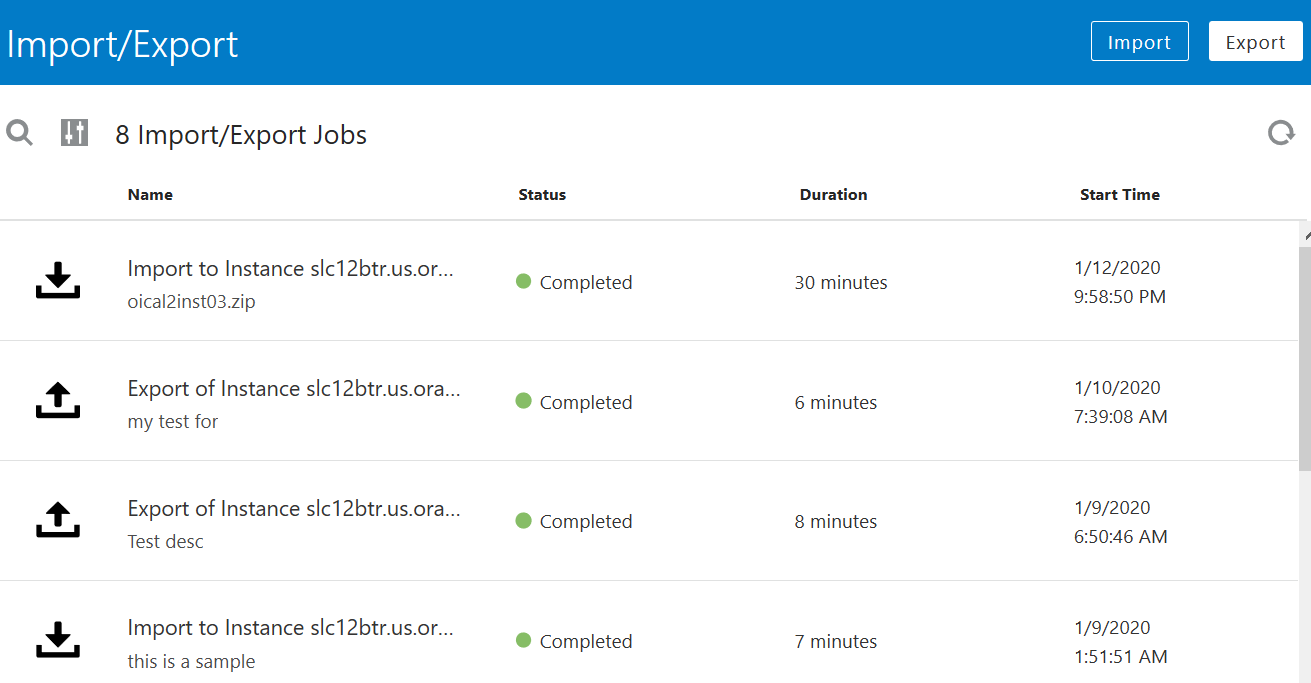
    The Import/Export page is displayed with the status of any import and export jobs.


    Description of import_export_page.png follows

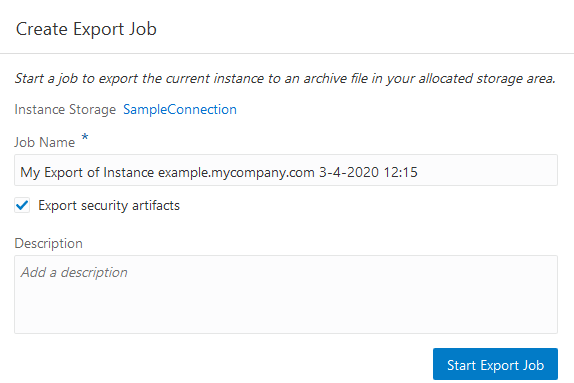
  2. Click Export to create a job. A job consists of an archive file of design-time metadata that you want to export to the object storage bucket you configured on the Instance Storage page. If you have not configured an object storage bucket, you are prompted to click Configure Now.
  3. Complete the following fields.
    Element Description
    Job Name Enter a unique job name or accept the default value.
    Export security artifacts Select the check box to export the following security artifacts with your job:
    • Security policies
    • Security credentials (for connections)
    • Customer certificates
    • Application role memberships in Processes
    .
    Description Enter an optional description that describes the export job.

    Description of create_export_job.png follows

  4. Click Start Export Job.
    A message is displayed in the banner at the top of the page.
    Export job has been successfully started.
  5. View the status of export job creation and click the refresh icon periodically to view progress. You can click the job name to view more specific job details.

    Import/export jobs status, including name, status, duration, and start time

    When the export job completes successfully, Completed is displayed in the Status field.
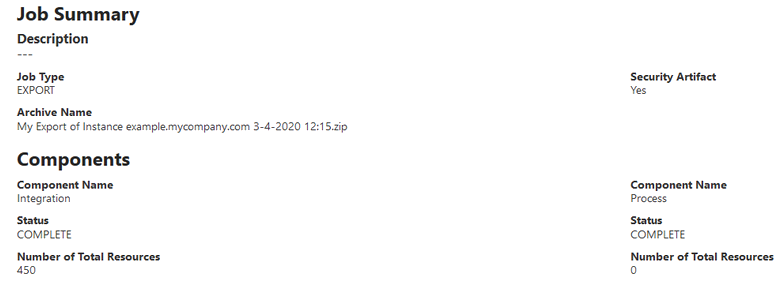
  6. Click Open Details icon to view details about a job.

    Description of job_summary_export.png follows

  7. If export archive creation does not complete successfully, click Download detailed report icon to download a report about the export job.

Create an Import Job

You create a job to import the exported archive job from the object storage bucket instance into the new instance.

  1. Sign in to the instance in which to import the exported archive of design-time metadata.
  2. On the Home page, select Settings > Import/Export.
  3. Click Import to create a job to import the exported archive job from the object storage bucket instance into the new instance.
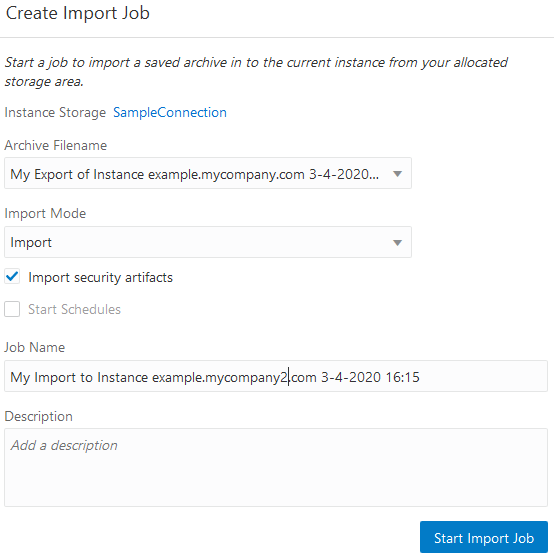
  4. Complete the following fields.
    Element Description
    Archive Filename Select the archive to import into the instance.
    Import Mode Select the import mode:
    • Import: Imports all integrations in the archive. You can also select Activate and Start Schedules to activate all integrations and start all schedules during this same import session or during a separate session at a later time. Selecting those options separately enables you to first update any configuration properties in the imported integrations (for example, modify any necessary configuration or security properties on the Connections page for each integration).
    • Activate: Activates all integrations imported with the Import option during the same session or during a separate session. You can also select Start Schedules to start any integration schedules.
    • Start Schedules: Starts integration schedules during the same session in which you selected Import and Activate or during a separate session.
    Import security artifacts Select this check box if you previously selected Export security artifacts when creating your export archive job.
    Job Name Enter a unique job name or accept the default value.
    Description Enter an optional description that describes the import job.

    Description of create_import_job.png follows

  5. Click Start Import Job to start the job to import the archive from the object storage bucket instance into the new Oracle Integration instance.
    A message is displayed in the banner at the top of the page.
    Import job has been successfully started.
  6. View the status of import job creation and click the refresh icon periodically to view progress.
    When the import job completes successfully, Completed is displayed in the Status field.
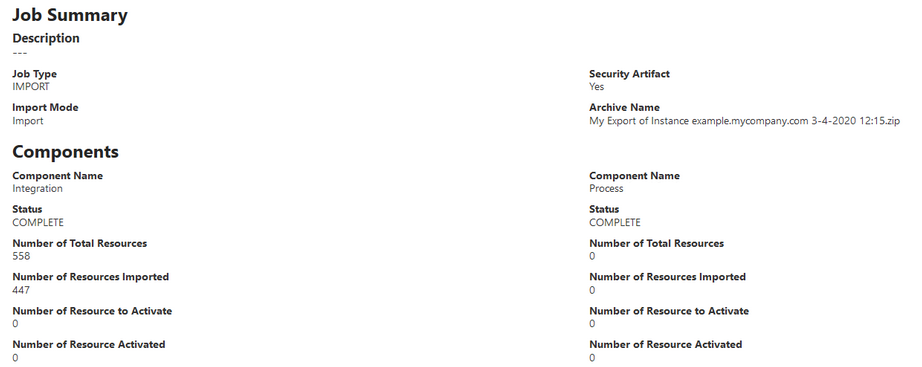
  7. Click Open Details icon to view details about the job.

    Description of job_summary_import.png follows

  8. If the import archive is not successful, click Download detailed report icon to download a report about the import job.
  9. Browse the pages and note that the design-time metadata you exported is now visible. For example, for Integrations, look for integrations, connections, lookups, and more. For Processes, look for process applications and decision models.
    Note

    Your archive file resides in the object storage bucket until you delete it.