Deployment using OCI Data Science Job
ML Monitoring Application can be quickly set up using OCI Data Science Job and ML Monitoring Application managed container image.
Configure required policy and dynamic rules
Provision OCI Data Science Job
Trigger Data science job run passing the required runtime configuration
Add Dynamic Groups Rules
Create Dynamic Groups and add following rules for setting up OCI resources
ALL {resource.type='datasciencejobrun', resource.compartment.id = '<COMPARTMENT_ID>'}
Here COMPARTMENT_ID is the OCID of Compartment in which user need to setup OCI Data Science Job resource and push logs for ML Monitoring Application run .
See also
Add Policy Rules
Policy rules required to be added for authorizing and giving access permission to OCI resources within user’s compartment via dynamic-group. Give the required permission using the following policy to all the resources defined in the dynamic group previously created.
Allow dynamic-group <ml-monitoring-application-dynamic-group> to manage log-groups in compartment <COMPARTMENT NAME>
Allow dynamic-group <ml-monitoring-application-dynamic-group> to use log-content in compartment <COMPARTMENT NAME>
Allow dynamic-group <ml-monitoring-application-dynamic-group> to manage objects in compartment <COMPARTMENT NAME>
Allow dynamic-group <ml-monitoring-application-dynamic-group> to read buckets in compartment <COMPARTMENT NAME>
The OCI Autonomous Data Warehouse (ADW) reader and post processor must connect to the OCI ADW database using the database credentials and wallet files present in OCI vault. Add the following permission to access the OCI resource:
Allow dynamic-group <ml-monitoring-application-dynamic-group> to read secret-bundles in compartment <COMPARTMENT NAME>
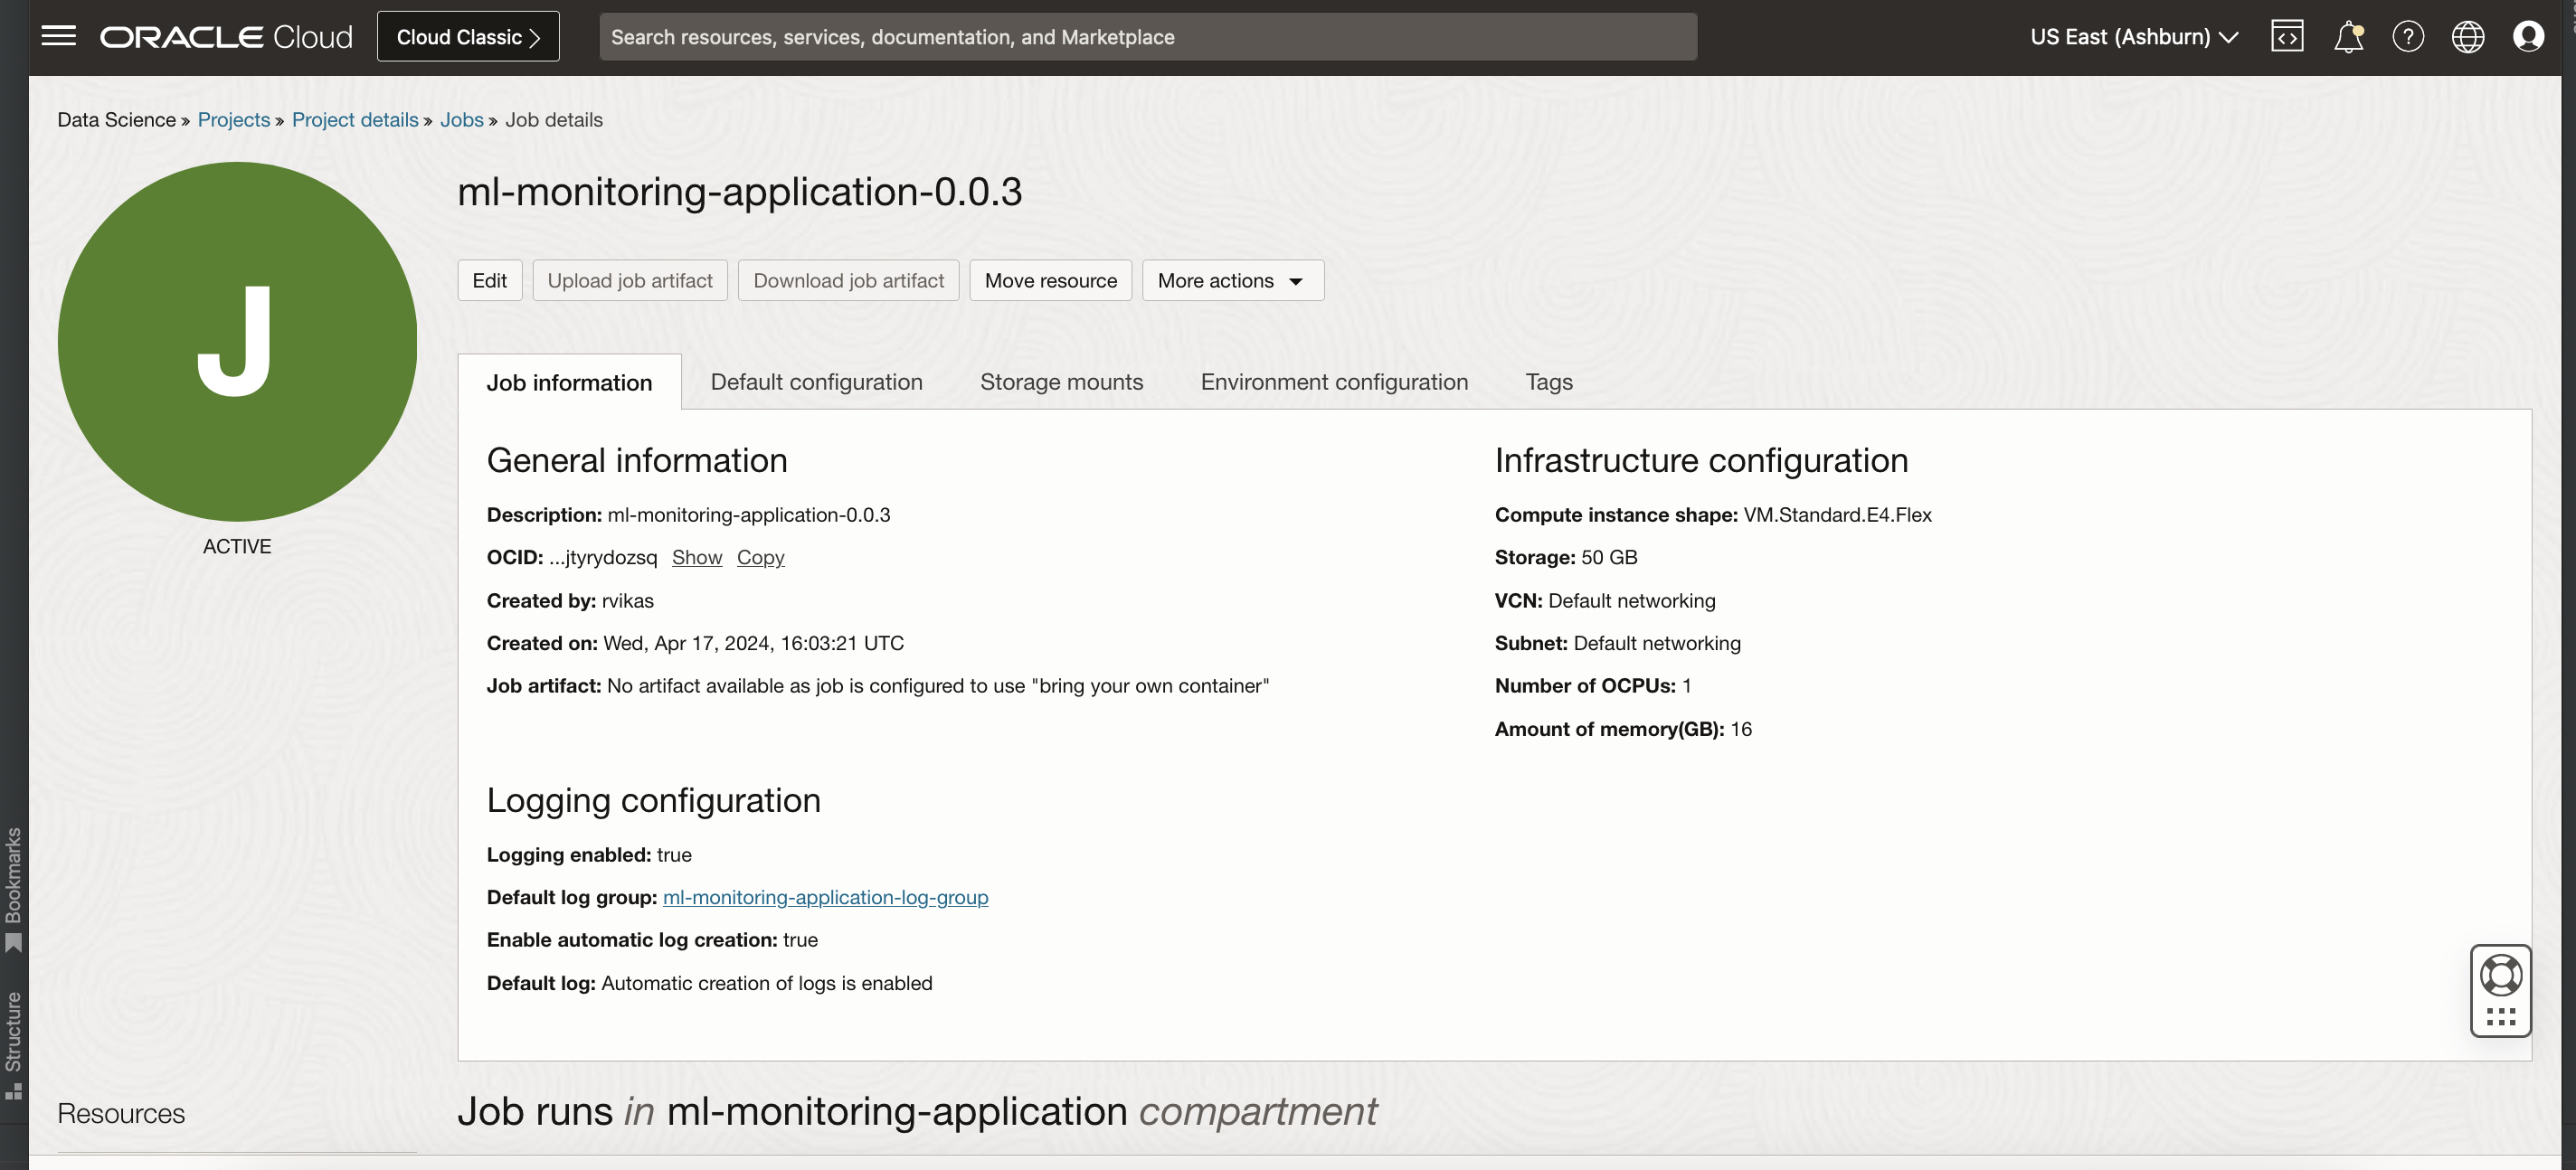
Configure OCI Data Science Job
Steps to setup OCI Data Science Job:
Create the OCI Data Science Job using the link.
Note
Don't use BYOC while creating the job for the ML Monitoring Application.
Don't use Fast Job. Only Custom Configuration is supported.
Don't use ARM shapes. Only Intel and AMD shapes are supported.
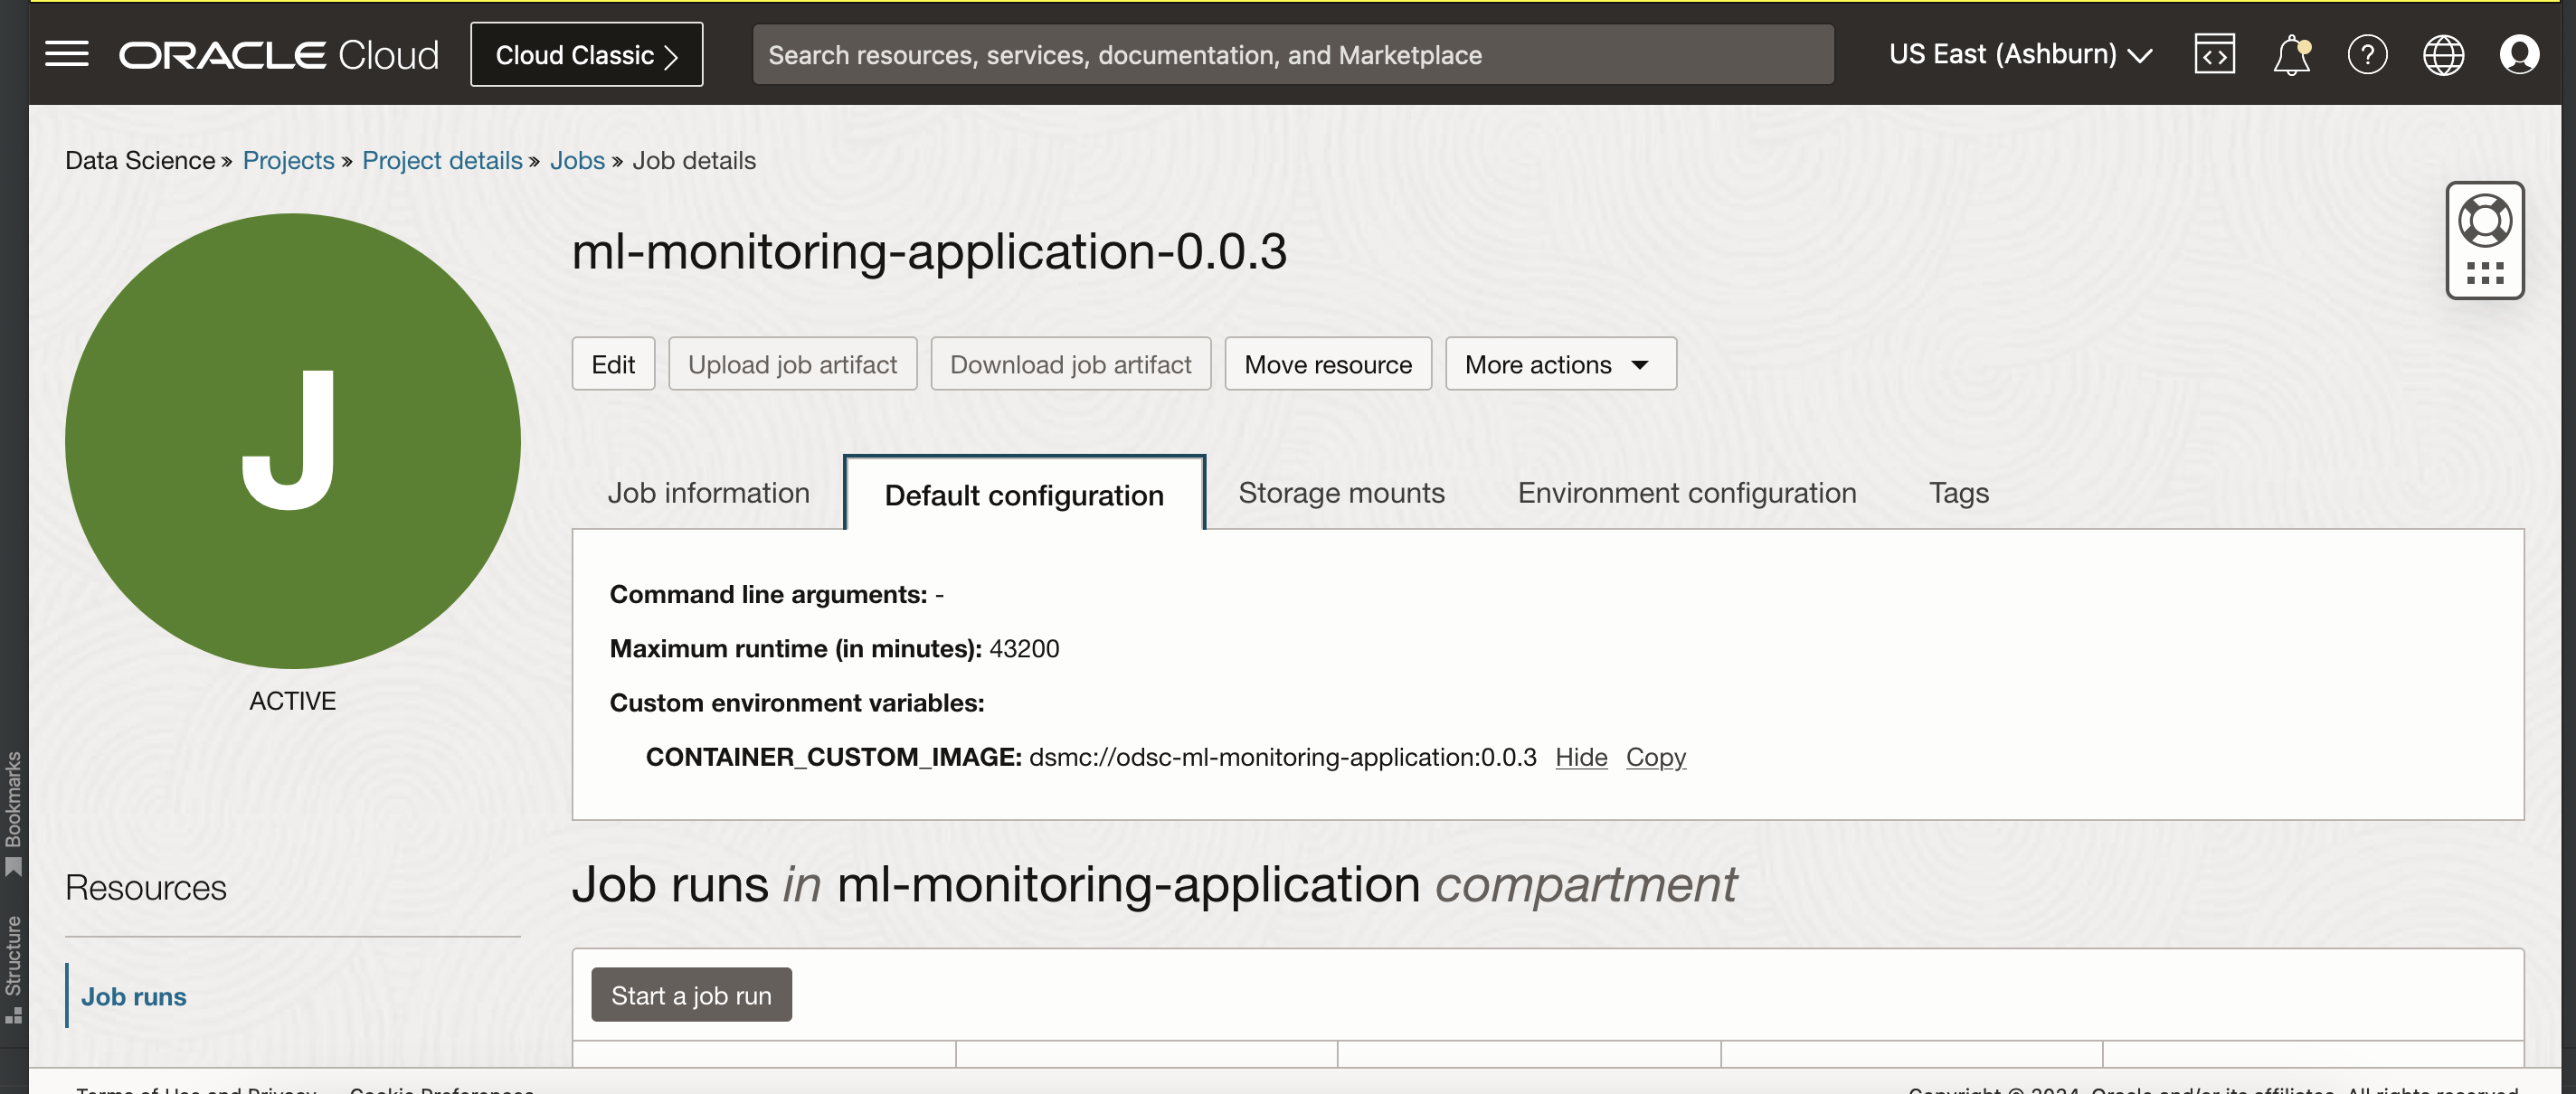
- Set the following environment variable while configuring the job:
Key
Description
Value Example
CONTAINER_CUSTOM_IMAGE
Managed Container moniker for ML Monitoring Application. Available versions
"dsmc://odsc-ml-monitoring-application:<version>"
For example
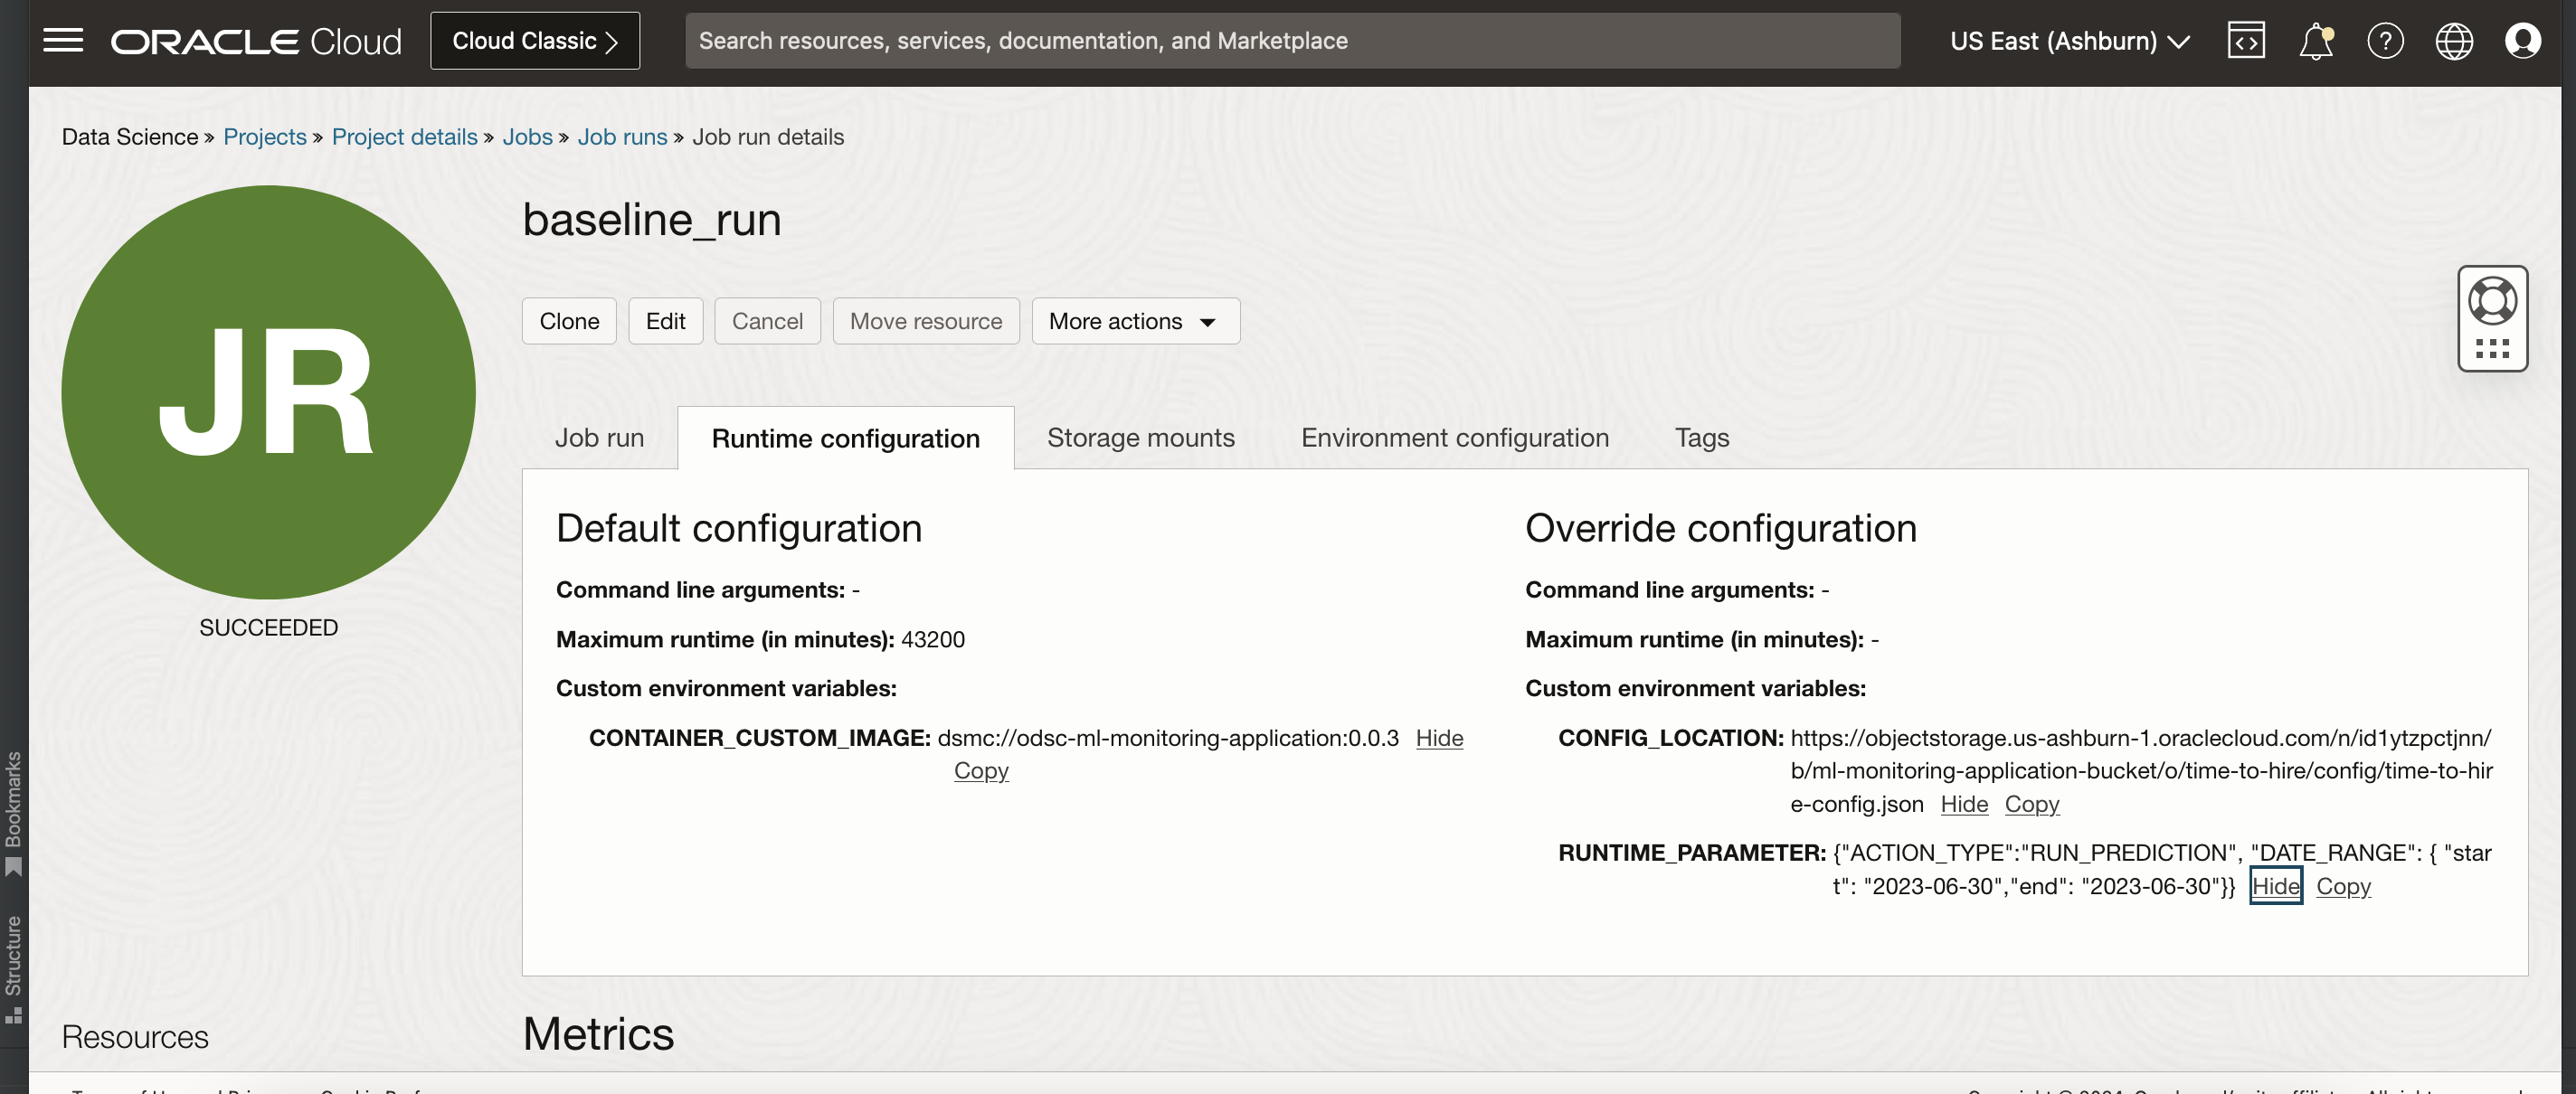
Run OCI Data Science Job
After the OCI Data Science Job is created using ML Monitoring Application managed container, use the OCI Data Science Job Run to repeatedly run the job.
Steps to configure OCI Data Science Job Run:
Create the OCI Data Science Job Run using the link.
Override the default job configuration that was defined when the job was created or add new runtime job configuration
See the input contract to add runtime configuration
For example

Other ways of creating Job and Job Runs
CLI
Use the Data Science CLI to create a job as in this example:
- Create a job with:
oci data-science job create \
--display-name <job_name>\
--compartment-id <compartment_ocid>\
--project-id <project_ocid> \
--configuration-details file://<jobs_configuration_json_file> \
--infrastructure-configuration-details file://<jobs_infrastructure_configuration_json_file> \
--log-configuration-details file://<optional_jobs_infrastructure_configuration_json_file>
- Use this jobs configuration JSON file:
{
  "jobType": "DEFAULT",
  "environmentVariables": {
        "CONTAINER_CUSTOM_IMAGE": "dsmc://odsc-ml-monitoring-application:<version>"
  }
}
- Use this jobs infrastructure configuration JSON file:
{
  "jobInfrastructureType":"ME_STANDALONE",
  "shapeName": "<shape_name>",
  "blockStorageSizeInGBs": "block_storage_size_in_GBs"
}
- (Optional) Use this jobs logging configuration JSON file:
{
  "enableLogging": true,
  "enableAutoLogCreation": true,
  "logGroupId": "<log_group_ocid>"
}
- Create a job run with:
oci data-science job-run create \
--display-name <job_name>\
--compartment-id <compartment_ocid>\
--project-id <project_ocid> \
--job-id <job_ocid> \
--configuration-override-details file://<jobs_override_configuration_json_file>
- Use this job run override configuration JSON file:
{
  "jobType": "DEFAULT",
  "environmentVariables": {
        "CONFIG_LOCATION": "<HTTP_LOCATION_OF_OCI_STORAGE_APPLICATION_CONFIG_FILE_PATH>"
        "RUNTIME_PARAMETER": "{"ACTION_TYPE":"RUN_CONFIG_VALIDATION"}"
  }
}
API
The ADS SDK is also a publicly available Python library that you can install with this command:
pip install oracle-ads
It provides the wrapper that makes the creation and running jobs from notebooks or on your client machine easy.
Use the ADS SDK to create job and run jobs.
job_and_job_run_example.py
import ads
import os
from ads.jobs import Job, DataScienceJob, PythonRuntime

# Setting OCI_ODSC_SERVICE_ENDPOINT
os.environ['OCI_ODSC_SERVICE_ENDPOINT'] = 'https://datascience-int.us-ashburn-1.oci.oc-test.com'

def create_job_and_job_run():
        rp_version = os.environ.get("OCI_RESOURCE_PRINCIPAL_VERSION", "UNDEFINED")

        # Setting authentication

        # Setting local authentication
        if not rp_version or rp_version == "UNDEFINED":
                ads.set_auth("security_token", oci_config_location="~/.oci/config", profile="DEFAULT")
        else:
                # Setting Resource Principal authentication
                ads.set_auth("resource_principal")

        job = (
                Job(name="Job_creation_using_Ads")
                        .with_infrastructure(
                        DataScienceJob()
                                .with_compartment_id(COMPARTMENT_OCID)
                                .with_project_id(PROJECT_OCID)
                                .with_job_type('DEFAULT')
                                .with_shape_name("SHAPE_NAME")
                                .with_block_storage_size(BLOCK_STORAGE_SIZE)
                                .with_log_group_id(LOG_GROUP_OCID)
                                .with_job_infrastructure_type('ME_STANDALONE')
                )
                        .with_runtime(
                        PythonRuntime()
                                .with_environment_variable(CONTAINER_CUSTOM_IMAGE="dsmc://odsc-ml-monitoring-application:<version>")
                )
        )

        # Create Job
        job.create()

        # Create Job Run
        job_run = job.run(
                name="ML_Monitoring_Validation_Run_ads_1",
                env_var={
                        "CONFIG_LOCATION": "<HTTP_LOCATION_OF_OCI_STORAGE_APPLICATION_CONFIG_FILE_PATH>",
                        "RUNTIME_PARAMETER": "{\"ACTION_TYPE\":\"RUN_CONFIG_VALIDATION\"}"
                }
        )
Terraform
Use the Data Science Create Job Terraform to create a job.
Use the Data Science Create Job Run Terraform to create a job run.