Receive and Inspect the Shipment
Carefully inspect the Roving Edge Device shipment before you unpack the shipment.
Report any damage or concerns to Oracle using a Support Request ticket. See Creating a Support Request.
Confirm Ordering and Shipping Details
Perform these steps to gather information you can use to inspect the shipment and ensure that you received a tamper free device.
-
Sign in to your Oracle Cloud Infrastructure (OCI) tenancy.
-
From the console navigation menu, select Hybrid, then select Roving Edge Infrastructure.
- Select the compartment for this device.
-
Select Manage Nodes.
-
Select the node name to display the details page, and make note of these details:
- Device request is updated to a Delivered status
- The date and time it was received
- The serial number Note
For devices that are self-provisioned, the serial number isn't available in the node until the device has connectivity to your tenancy, as described in Set Up Connectivity to OCI. If you don't see a serial number in the node, skip this step. You're instructed to verify the serial number later during self-provisioning.
Inspect the Shipment
- Visually inspect the device shipping container for any damage, tampering, or missing ties before opening it.
-
Compare the serial number that appears on all the security ties with the serial number listed for the node in your tenancy. Note: Skip this step for self-provisioned devices.
Note
On Roving Edge 2 devices, the serial number is located on the pullout card on the front of the device. See Roving Edge Device 2 – Front Panel.
- Unpack and visually inspect the device for any tampering or damage.
-
Ensure that you've received all the shipping kit contents. See one of the following inventory sections:
Roving Edge Device Shipment Inventory
The device ships with either a ruggedized case or a rackmounting kit based on what was specified when the device node was created. See Creating a Roving Edge Device 1 Node (Deprecated).
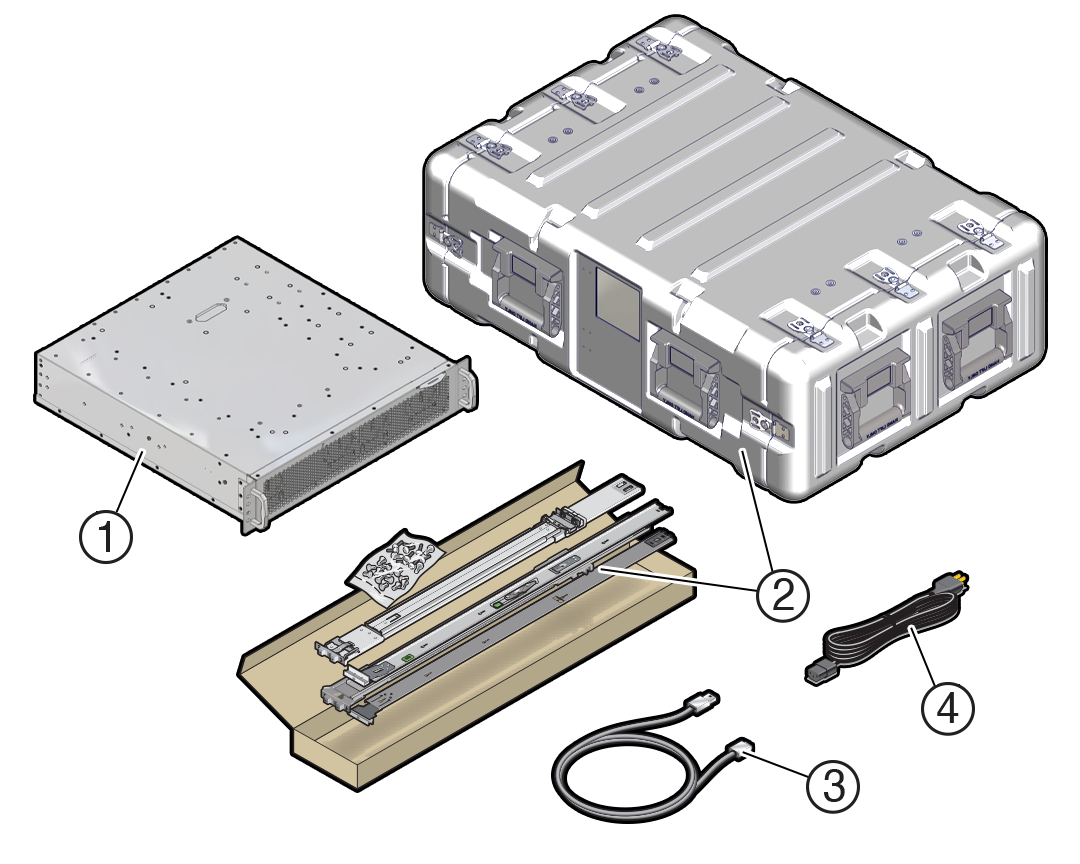
| No. | Item |
|---|---|
| 1 |
Roving Edge Device (GPU, Compute, or Storage model) |
| 2 |
One of the following:
|
| 3 |
USB-to-DB-9 serial cable For devices with ruggedized cases, the cable is in a pouch inside the rear of the case. |
| 4 |
AC power cord For devices with ruggedized cases, the power cord is in a pouch inside the rear of the case. |
- If your device is inside a ruggedized case, see Remove the Ruggedized Case End-Caps.
- If the device isn't in a ruggedized case, install your device in a rack. See Mount the Device in a Rack.
Roving Edge Ultra Shipment Inventory
Each Roving Edge Ultra includes the following items:
- Roving Edge Ultra
- Battery
- KVMA ruggedized power adapter
- RJ-45 to DB-9 to USB cable
- RJ-45 to CAT5/6 cable
- AC power cord
- Rugged transportation case
What's next?
For Roving Edge Ultra, see Assemble Roving Edge Ultra.