Using Oracle Database API for MongoDB
Oracle Database API for MongoDB makes it possible to connect to Oracle Autonomous AI Database using MongoDB language drivers and tools.
Oracle Database API for MongoDB leverages the converged database capabilities of an Autonomous AI Database to manage multiple data types, including JSON data, within a single database. For example, these converged database capabilities allow you to use SQL to query or update JSON data.
MongoDB requires that you configure network access to use ACLs or that you define a private endpoint for the Autonomous AI Database instance.
See Oracle Database API for MongoDB for more information.
See About Autonomous JSON Database for more information.
See About Autonomous AI Database Workload Types for more information.
Topics
- Configure Access for MongoDB and Enable MongoDB
Oracle Database API for MongoDB enables you to use an Oracle Autonomous AI Database as the data store. - User Management for MongoDB
Oracle Database API for MongoDB enables you to use an Oracle Autonomous AI Database as the data store. If you want to use an existing Autonomous AI Database for this purpose, here is the workflow. - Create a Test Autonomous Database User for MongoDB
- Connect MongoDB Applications to Autonomous AI Database
Connecting your MongoDB application to Autonomous AI Database includes several steps, depending upon your requirements.
Parent topic: Develop
Configure Access for MongoDB and Enable MongoDB
Oracle Database API for MongoDB enables you to use an Oracle Autonomous AI Database as the data store.
To use the MongoDB API you can create and configure a new Autonomous AI Database or modify the configuration of an existing Autonomous AI Database.
MongoDB requires that you configure network access to use ACLs or that you define a private endpoint for the Autonomous AI Database instance. In addition to configuring the network access, you must enable MongoDB API on the Autonomous AI Database instance.
- Configure Access for MongoDB
To use the MongoDB API, you can create and configure a new Autonomous AI Database or modify the configuration of an existing Autonomous AI Database by configuring ACLs or by defining a private endpoint. - Enable MongoDB API on Autonomous AI Database
After you configure the network access for the Autonomous AI Database instance, enable the MongDB API.
Parent topic: Using Oracle Database API for MongoDB
Configure Access for MongoDB
To use the MongoDB API, you can create and configure a new Autonomous AI Database or modify the configuration of an existing Autonomous AI Database by configuring ACLs or by defining a private endpoint.
Configure a New Autonomous AI Database for MongoDB
Follow the steps in Provision or Clone an Autonomous AI Database, up to the point where you select your Network Access Type.
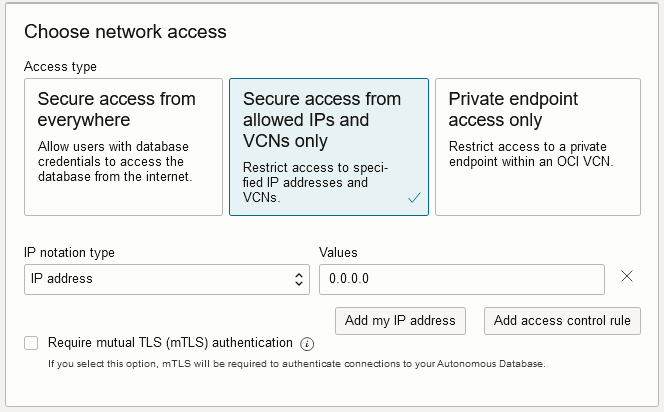
Description of the illustration adb_network_access_acl_provision.png
At this point, to use Oracle Database API for MongoDB configure secure access by selecting and configuring one of these network access types:
-
Secure access from allowed IPs and VCNs only
-
Private endpoint access only
See Configure Network Access with Private Endpoints for information on configuring an Autonomous AI Database instance with a private endpoint.
Configure an Existing Autonomous AI Database for MongoDB
Open the Oracle Cloud Infrastructure Console for your Autonomous AI Database instance.
To use Oracle Database API for MongoDB the Network must be configured and the Access type must be either: Secure access from allowed IPs and VCNs only or Private endpoint access only.
Access Control List (ACL) Setup
See Configure Access Control Lists for an Existing Autonomous AI Database Instance for more information.
-
In the choose network access area, click Add my IP address. This copies your IP address into the Values field.
- After disabling any VPN, use the WhatIsMyIP website.
- After disabling any VPN, use the curl command:
curl -s
                            https://ifconfig.me
.
Public IP addresses may change. Any change to your public IP address will require a change in the ACL. If you are unable to access your database, your ACL should be something you check.
ACLs Types and Use Cases
| ACL Type | Use Case | Comment |
|---|---|---|
| IP Address | Local development laptops sharing the same public IP address | Easiest way to get started. Any laptop connected on this LAN will have access to the database with the database credentials. |
| CIDR Block | Local development laptop | Using IPv4/32 notation |
| IP Addresses separated by commas | Small number of local development laptops connected on distinct LANs (having distinct public IP addresses) | Can be tedious to manage with 10+ laptops. |
| CIDR Block | Local development laptops connected on the same subnet exposed to Internet (each laptop has its own public IP Address) | Rely on CIDR Block notation. See calculator here for more information. Example: 89.84.109.0/24 gives 256 possible IP addresses from 89.84.109.0 to 89.84.109.255 |
| VCN with CIDR Block | For testing, production, or CI/CD pipeline hosted on OCI having their own VCN and Compute instances | Assign OCI compartment per environment type. |
| Mixing IP Address and VCN with CIDR Block | Local development laptop accessing a test Autonomous AI Database with connections from the testing environment or CI/CD pipeline | A common configuration option for on-going development work. |
Parent topic: Configure Access for MongoDB and Enable MongoDB
Enable MongoDB API on Autonomous AI Database
After you configure the network access for the Autonomous AI Database instance, enable the MongDB API.
To enable the MongoDB API for an existing instance:
- On the Autonomous AI Database details page, select the Tool configuration tab.
- Click Edit tool configuration.
- In the MongoDB API row, select in the Enable tool column to show Enabled.
- Click Apply.
The Lifecycle state changes to updating until MongoDB is enabled.
You can also enable the MongoDB API when you provision or clone an instance by selecting Show advanced options and selecting the Tools tab.
See Manage Autonomous AI Database Built-in Tools for more information.
Parent topic: Configure Access for MongoDB and Enable MongoDB
User Management for MongoDB
Oracle Database API for MongoDB enables you to use an Oracle Autonomous AI Database as the data store. If you want to use an existing Autonomous AI Database for this purpose, here is the workflow.
Oracle Database API for MongoDB enables the mapping of Autonomous AI Database objects to MongoDB objects as follows:
| MongoDB Object | Oracle Autonomous Database Object |
|---|---|
| database | schema |
| collection | table |
| document | document (in a column) |
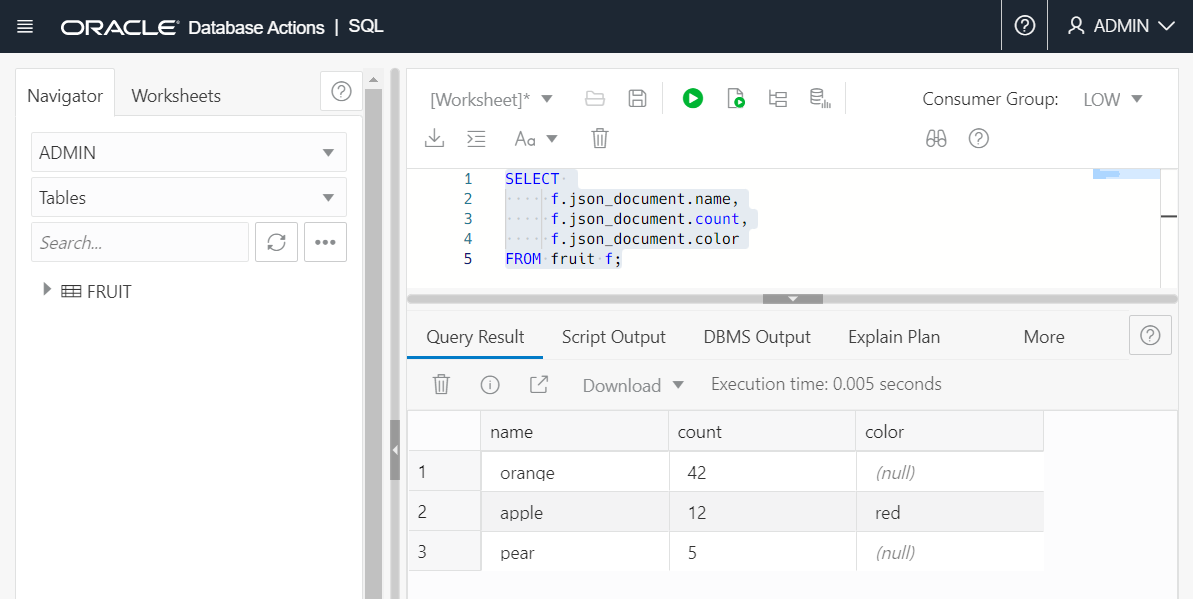
For example, you could create a collection using the Oracle Database API for MongoDB as follows:
  use scott;
  db.createCollection('fruit');
A table named FRUIT is created in the schema
SCOTT.
When you connect to the Oracle Database API for MongoDB, you authenticate using an Autonomous AI Database username and password. This authenticated connection then accesses collections within the corresponding schema. This user must meet the following requirements:
- The user's schema must be ORDS-enabled, which is sometimes referred to as enabled for Web Access. See Basic Setup to Enable ORDS Database API for more information.
- The user must have the following roles and privileges:
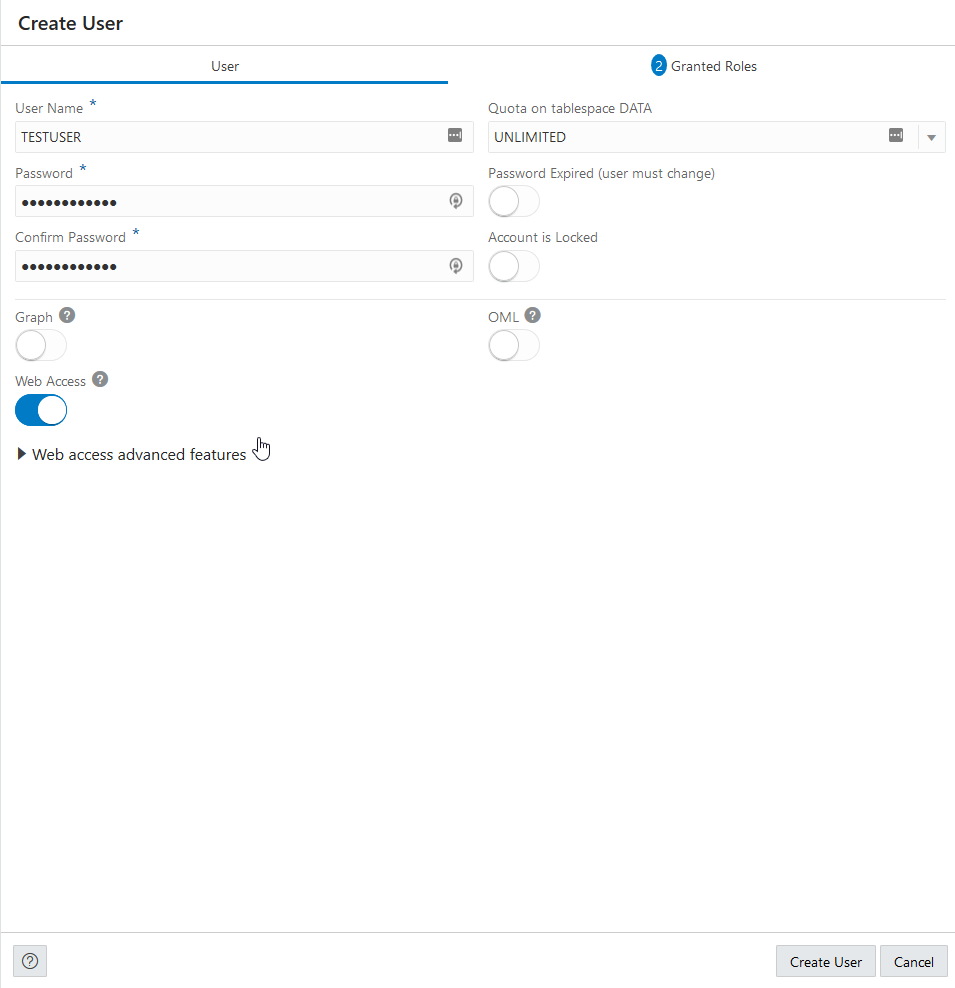
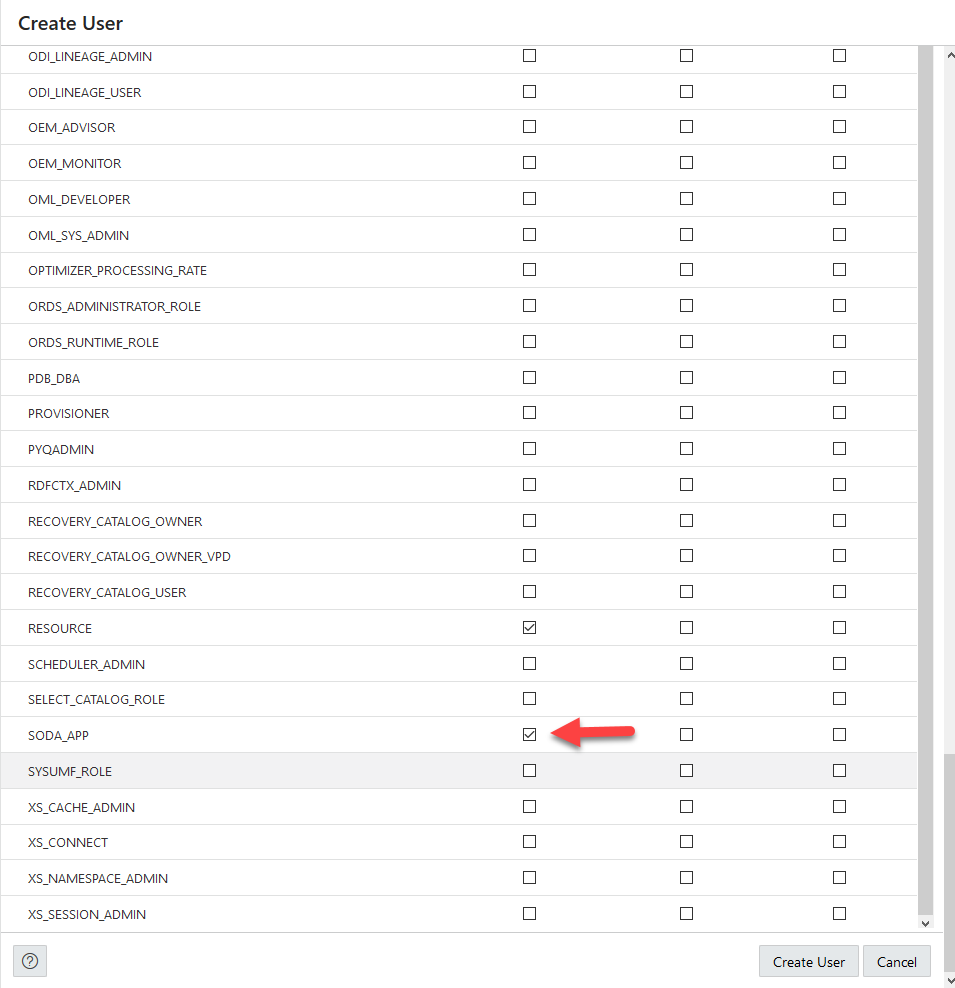
SODA_APP,CREATE TABLE, andCREATE SESSION. See Manage User Roles and Privileges on Autonomous AI Database for more information. - The user has available quota on tablespace DATA. See Create Users on Autonomous AI Database for more information.
- The user must be granted the privilege
EXECUTEon packageCS_SESSIONto benefit from automatic parallel index creation. Otherwise, indexes are created serially.See CS_SESSION Package for more information.
The role
DWROLE in Autonomous AI Database contains these roles, among
others.
Access to schemas not granted to the user is prohibited. For example, the user SCOTT
can only access collections in the schema SCOTT. There is one exception. If the
authenticated user has the Autonomous AI Database
privileges CREATE USER, ALTER USER and DROP
USER, that user can access any ORDS-enabled schema.
Additionally, a user with these privileges can implicitly create schemas. That is, when the user creates a collection in a database that does not exist, the schema is created automatically. See Oracle Database API for MongoDB for more information.
Parent topic: Using Oracle Database API for MongoDB
Create a Test Autonomous Database User for MongoDB
Parent topic: Using Oracle Database API for MongoDB
Connect MongoDB Applications to Autonomous AI Database
Connecting your MongoDB application to Autonomous AI Database includes several steps, depending upon your requirements.
- Retrieve the Autonomous AI Database MongoDB Connection String
You can retrieve the MongoDB API connection string from the Oracle Cloud Infrastructure Console. - Test Connection Using the Command Line
- Test Connection Using a Node.js Application
Parent topic: Using Oracle Database API for MongoDB
Retrieve the Autonomous AI Database MongoDB Connection String
After you obtain the MongoDB API connection string you can use the MongoDB Shell, which is a command-line utility, to connect and query your data.
First you must configure network access and enable the MongoDB API. See Configure Access for MongoDB for more information.
To retrieve the MongoDB API connection string:
- On the Autonomous AI Database details page, select the Tool configuration tab.
- In the MongoDB API row, under Access URL click Copy.
Parent topic: Connect MongoDB Applications to Autonomous AI Database
Retrieve the Autonomous AI Database Connection String from Database Actions
Test Connection Using the Command Line
Parent topic: Connect MongoDB Applications to Autonomous AI Database
Test Connection Using a Node.js Application
Parent topic: Connect MongoDB Applications to Autonomous AI Database
